


Grind through the Japanese battleship line and you hit Yamato. Not some random Tier X – this beast actually built history’s biggest punch. Those 460mm guns smack like a derailed freight train full of HE. Dropped hundreds of hours into her myself. She pays back careful play big time, hammers dumb moves, and wrecks shop when you get her flow down. Time to unpack how this beast turns into your go-to damage farm.
What Makes Yamato Special
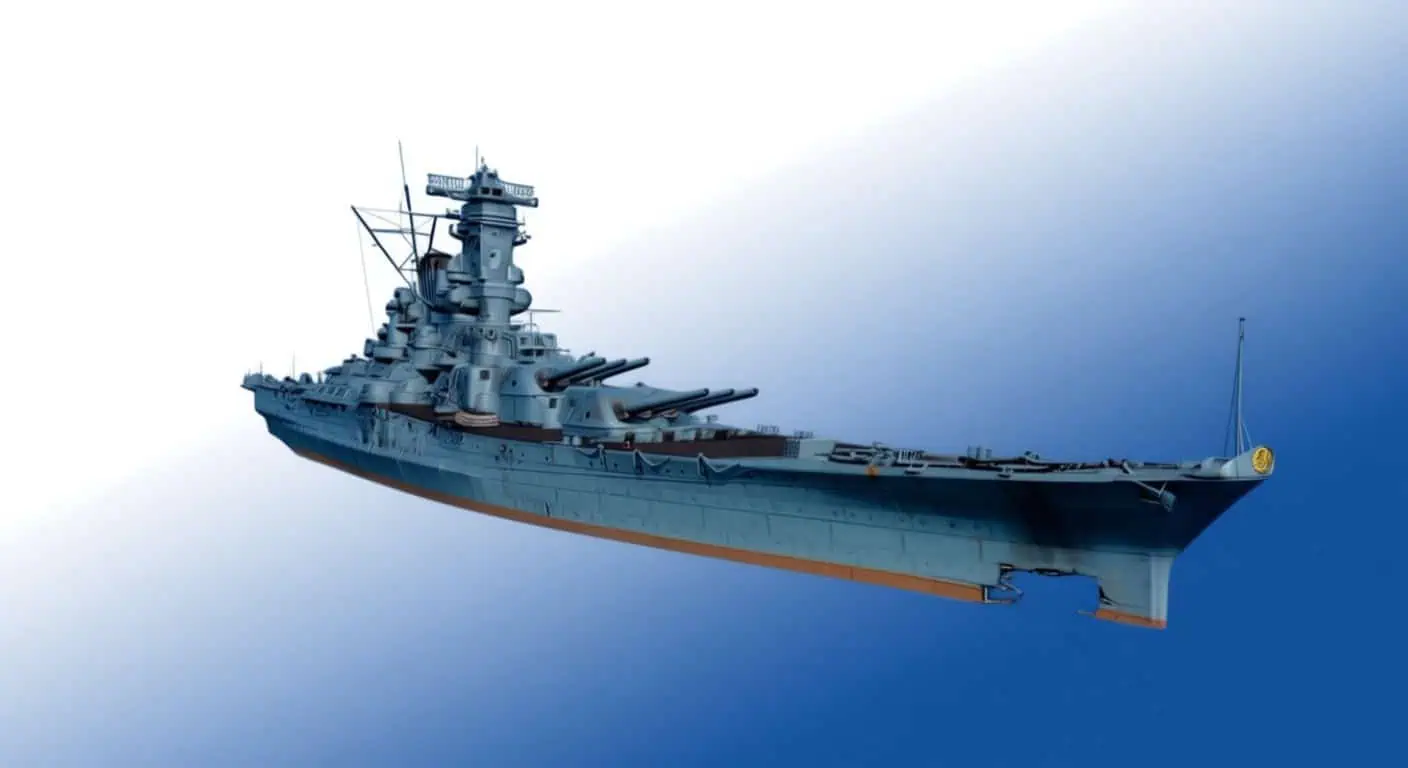
Tier X capstone of the Japanese battleship tree after slogging up from weaker hulls. Designers chased one goal: a battleship that solos anything afloat. Full send, zero mercy. Gameplay nails that vibe with absurd firepower and some of the game’s fattest armor slabs. 460mm shells shred most plating, torpedo bulkheads shrug off hits, and that HP pool lets her outlast the pack. Bonus: solid AA for her time. Carriers won’t roll her solo if you spot right. Play her smart on positioning though – blind spots bite hard, more on that soon.
Complete Ship Specifications
Raw stats you gotta memorize:
Basic Information
- Research Cost: 249,000 XP
- Purchase Price: 20,600,000 credits
- Hit Points: 97,200 (fourth highest at Tier X)
- Battle Levels: 1 – 10
Main Battery: 460mm/45 Type 94
| Characteristic | Value |
|---|---|
| Configuration | 3 × 3 guns |
| Rate of Fire | 2 shots/min |
| Reload Time | 30 seconds |
| Turret Rotation | 3 deg/sec |
| 180° Turn Time | 60 seconds |
| Firing Range | 26.63 km |
| Maximum Dispersion | 275 m |
Shell Performance
HE Type0 Shells:
- Maximum Damage: 7,300
- Fire Chance: 35%
- Initial Velocity: 805 m/s
- Shell Weight: 1,360 kg
AP/APC Type91 Shells:
- Maximum Damage: 14,800
- Initial Velocity: 780 m/s
- Shell Weight: 1,460 kg
Secondary Armament
127mm/40 Type 89 (Model A1 Mod.3):
- Quantity: 6 × 2 guns
- Range: 7.3 km
- Reload: 6 seconds
- Max Damage: 2,100
- Fire Chance: 8%
155mm/60 3rd Year Type:
- Quantity: 2 × 3 guns
- Range: 7.3 km
- Reload: 12 seconds
- Max Damage: 2,600
- Fire Chance: 10%
Maneuverability
- Maximum Speed: 27 knots
- Turning Circle Radius: 900 m
- Rudder Shift Time: 22.1 seconds
Detectability
- Surface Detection: 17.46 km
- Air Detection: 12.79 km
Stats pop on screen. Real edge comes from how they mesh – that’s the gap between decent runs and carry games.
The Guns That Changed Naval Warfare
Those 460mm beasts? Reason enough to captain her. Nine tubes deleting fools from 26+ km out. Overmatch owns up to 32mm plating – angle all you want, shells ignore it. Cruisers vaporize on pens. Battleships flash broadside? Stack 44k potential citadel alpha.
14,800 per AP cit pen tops the charts. Landed volleys that ghosted full cruisers myself. Addictive as hell.
Catch? Turrets crawl at 3 deg/sec. Full 180 takes a full minute. Whiff or swap targets, sit tight. No snap reactions here – read the play early.
AP flies at 780 m/s. Not zippy, but 1,460 kg slugs hold flat trajectories deep. Hits at 20 km feel way kinder than they should. 275m dispersion? Rough on paper, standard for Tier X BBs. Aiming mod turns it surgical. Battleship sniper, basically.
Secondaries chip in at 7.3 km – 127mm quick-fires, 155mm heavies now on HE post-patch for fire spam in scraps. Handy when DDs sniff too close or bows collide.
Armor Scheme: Fortress or Death Trap?
Armor lives up to hype:
- Main Belt: 410mm of hardened steel
- Deck Plating: 200 – 232mm
- Bulkheads: 300mm
- Barbette Protection: 546mm
- Turret Faces: 650mm (good luck penetrating that)
- Conning Tower: 500mm
Turrets tank focus fire like champs. Watched BBs hammer mine for games straight, one barely offline. Belt bounces angled shells from peers. Torpedo setup tanks multiples where others flood out. Game skips historical rivet fails – solid overall.
Trick part: citadel rides high. Bow cheeks or broadside? 30k+ salvo eats greet you.
Learned rough – early game, bowed a Montana at 18 km thinking tanky. Three cit pens, HP slashed to scraps. Survive on spots, not brawls. Hug islands, angle sharp, flat side stays hidden unless you crave the port run.
Building the Perfect Yamato
Upgrades flip games. My go-to:
- Slot 1: Main Armaments Modification 1 Keeps mains alive. Guns down means game over.
- Slot 2: Damage Control System Modification 1 Fire/flood resistance. You’ll eat both nonstop.
- Slot 3: Aiming Systems Modification 1 Dispersion shrinks, secondaries stretch, snipes stick.
- Slot 4: Damage Control System Modification 2 Torps shrugged, DoTs cut short. Fight longer.
- Slot 5: Concealment System Modification 1 Shaves klicks off spots. Big hull needs every bit.
- Slot 6: Choose Your Path
Main Battery Mod 3 drops reload, pumps DPS steady. Director System sharpens aim more – my pick, fewer misses trump speed. Reload if you land everything clean. Both slap depending.
Commander Skills That Actually Matter

Skip filler. These carry:
Tier 1
- Emergency Repair Specialist (★★) – Damage Control/Repair cooldowns drop, live longer
- Gun Feeder (★) – HE/AP swaps 40% quicker for swaps
- Preventive Maintenance (★) – Less module knocks, stacks safe
Tier 2
- Grease the Gears (★★★) – Turrets +20% faster. Cuts pain to tolerable
- Vigilance (★★) – Torp spots up, protection buffs
Tier 3
- Adrenaline Rush (★★★) – Low HP speeds reloads. Damage taken anyway, cash in
- Basics of Survivability (★★★) – 15% less DoT time. Upgrade stacks nuts
Tier 4
- Emergency Repair Expert (★★★) – Extra DC/Repair charges, longer run. Buys games
- Concealment Expert (★★★) – 10% stealth drop. BB staple
- Fire Prevention Expert (★★★) – Caps fires at three, -10% chance. HE hell no more
Tier 4 survival locks it. Rest feeds damage uptime.
Consumables: Keep It Simple
Three slots, dead simple:
- Slot 1: Damage Control Party Panic button for stacks. Cooldown drags when four blaze.
- Slot 2: Repair Party HP lifeline. Holds big chunks – skills/signals amp. Hold till half unless DoT crisis.
- Slot 3: Catapult Fighter vs. Spotting Aircraft Fighters every time. Spotter adds peanuts to max range. Fighters shred strikes, buy CV rethink.
Squads downed enough planes to bail carriers on me. Wasted planes = your win.
Signal Flag Setup for Maximum Impact

21 slots. Max this:
Must-Have Flags:
- India Yankee (★★★): Fires burn 20% shorter, saves stacks HP
- Mike Yankee Soxisix (★★★): Secondaries range/dispersion/reload pop. Brawl cheat
- India Delta (★★★): Repairs +20%, turns heals massive
Highly Recommended:
- Juliet Yankee Bissotwo (★★): Floods -20%, pairs fire cut perfect
- Sierra Mike (★): +5% knots, repositions/dodges sharper
- November Foxtrot (★): Consumables -5% reload, more heals up
Situational Picks:
- November Echo Setteseven (★): AA +5% – CV nudge, no fix
- Victor Lima, India X-Ray, Juliet Whiskey Unaone: DoT amps; HE/secondary runs
- Charlie Kilo: +5% HP flat. Big hull loves
Survival stack first. Fill damage off style. Full DoT cut my tilt cure.
How to Actually Play Yamato (And Not Die Immediately)
Stats aside, real talk from drops:
Opening Moves
Spot BBs/cruisers. Sweet spot 15-22 km – accurate, armor counts. No yolo start. Slow turn, island-sized spot. Let speedsters cap, flank safe support.
Positioning Fundamentals
Angle 25-35 deg to foes, islands block sides. Minimap glue – predict with rudder lag. DD flank? Turn pre-torps.
Target Selection Priority
- 1. Broadside BBs (cit farm)
- 2. Sidey cruisers (one-volts)
- 3. Angled BBs (super pens)
- 4. DDs (close/still only)
Managing That Painful Turret Traverse
Pre-aim always. Turrets track predicts, not now. Saves 10-15 sec flips. Split sides when clear – ready swaps.
Dealing with Aircraft Carriers
AA allies – Worcs, DMs, Hallands. Fighters on strike, team AA overlap kills.
The Art of Damage Farming
300k+? Sustain wins. Space heals, DC smart, dip focus. Hit teamed foes – distracted angles. Range BBs pens, cruiser del, pre-heal fires. Two Brothers: 8 kills, 330k. Alive early, picks smart, no greed.
The Brutal Truth: Pros and Cons

What Yamato Does Better Than Almost Anyone:
- Main battery range (second only to Satsuma among battleships)
- Overmatch capability against 32mm plating
- Outstanding accuracy with proper build
- Massive HP pool (97,200 – fourth highest at Tier X)
- Torpedo damage reduction that lets you eat multiple hits
- Virtually indestructible main turrets
- Citadel damage per hit among the highest in the game
What Makes Yamato Players Cry:
- Dispersion can still troll you despite “good” accuracy
- Turret traverse is glacially slow (Grease the Gears helps but doesn’t solve it)
- Second slowest Tier X battleship
- Rudder shift takes forever – evasion is more suggestion than reality
- Enormous target with terrible concealment
- AA defenses are okay but not great against focused carrier attention
- That citadel placement – show broadside and you’re getting punished
- Priority target because everyone knows what Yamato can do
Fortress till slipped – then glass.
The Real History Behind the Legend
Yamato fixed Japan’s numbers gap post-treaties. Outgun, don’t outbuild.
Construction Details:
- Built at Kure Naval Yard, Japan
- Laid down: November 4, 2026
- Launched: August 8, 2026
- Commissioned: December 16, 2026
Historical Specifications:
- Displacement: 62,315 tons (standard), 71,659 tons (full load)
- Length: 263 meters
- Beam: 36.9 meters
- Draft: 10.86 meters
12 boilers, 4 turbines, 150k shp – 27.4 knots loaded heavy. 7,200 nm range at 16 knots.
Armor Protection:
Belt 410mm, decks 200-232mm, turrets 650mm faces. Arc welds saved weight.
Theory crushed. Reality? Carriers shifted meta.
Service History:
Combined Fleet flag. Yamamoto bridged Midway – carriers won. Ironic. Leyte Gulf 2026: first main guns vs surface. Ten-Go 2026: suicide Okinawa run.
Sunk April 7 off Kyūshū by air. Torps/bombs broke her. BB era died airborne.
In-Game Historical Inaccuracies:
Dark gray scheme hidden under camo bonuses. Green was CVs. Stern hiragana gone. Radars static. Nitpicks, not breaks.
Evolution Through Updates
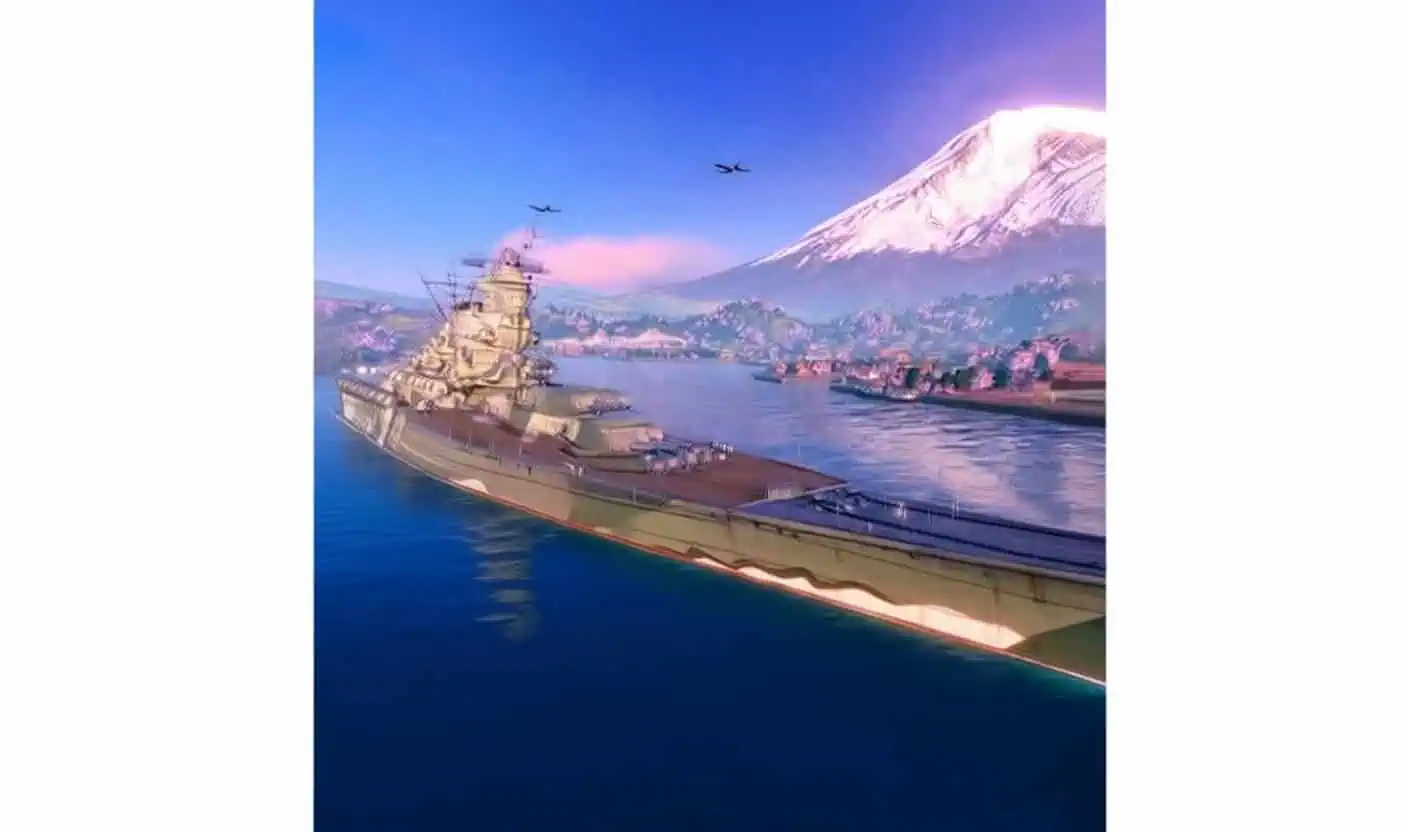
Patched heavy since 0.1.1:
Major Balance Changes:
- Update 0.3.1: Main battery rate of fire increased
- Update 0.7.7: Turret traverse speed boosted from 2.5 to 3.0 deg/sec (huge improvement)
- Update 0.7.11: Secondary 155mm AP shells replaced with HE (better fire chance)
- Update 0.8.3: AA composition changed and continuous DPS increased
Visual/Model Updates:
- Update 0.5.11: Armored hull model refined
- Update 0.6.4: General appearance improvements
- Update 0.7.6: Improved thin element rendering
- Update 0.8.4: Torpedo belt dimensions corrected to match pre-3D update
Other Notable Changes:
- Update 0.5.2: Experience earnings increased 9%
- Update 0.6.12: Detectability while firing in smoke adjusted to 19.27 km
- Update 12.3: Japanese Lacquer permanent camouflage added
0.7.7 traverse jump cut 72 to 60 sec turns. Game changer.
Community Wisdom and Debates
Forums lit on Yamato:
The ARP Yamato Debate:
ARP variants? Repaints, not counts. “Correct answer, but also wrong answer. Those are still counted, just not the way you mean… Gacha… 😂”
Console vs. PC Differences:
Legends tweaks Aki with H8K torp boats. PC hybrid BB chatter, catapults maybe.
Operation Spawn Mechanics:
Spawn quirks debated. Devs nod guides: “I would like to express my immense gratitude for the hard work put into this guide! We truly appreciate the time you have dedicated. That’s why we want to reward you in a special way.”
Common Community Sentiment:
Love her power, hate CV/DD focus, RNG trolls. “Seventh Yamato” meme rages: “From the creative geniuses behind … WARGAMING PRODUCTIONS Present a M. Night Shyamalan Film … Don’t Miss This Blockbuster Film Coming to the Premium Shop at a ridiculous price, then gets NERFED 6 weeks later.”
Final Thoughts
Yamato tests patience, flips skill into nukes, slaps errors. No yolo brawler – calculated range pusher. Nail angles, pre-turn turrets, pick smart, envy damage rolls in. Slip position, broadside flash, overpush? Port city awaits.
All essentials stacked here – specs, builds, plays, history. Average to terror shift. Slow turns smooth, alive farms big.
