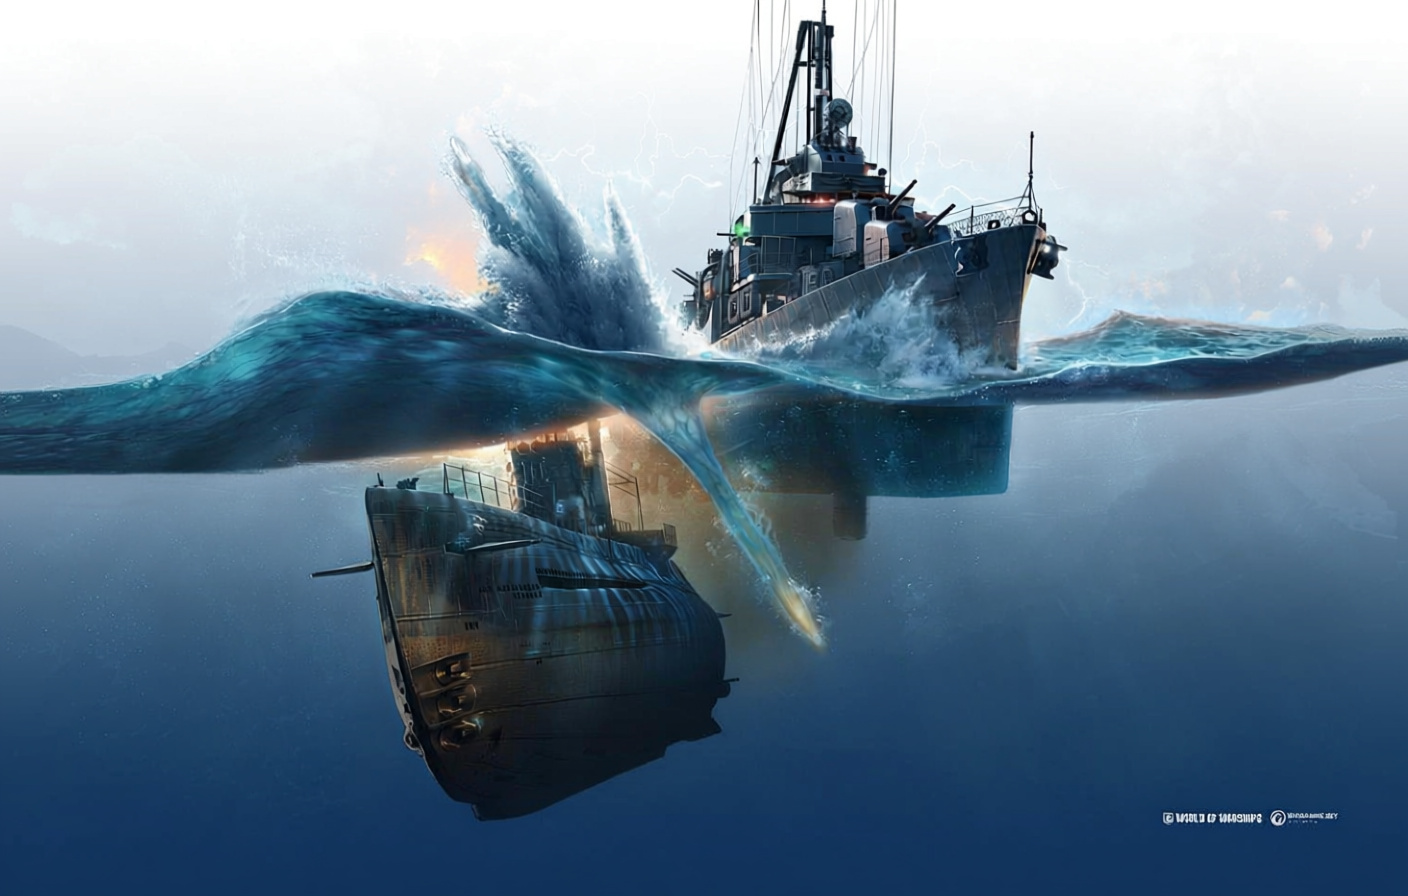
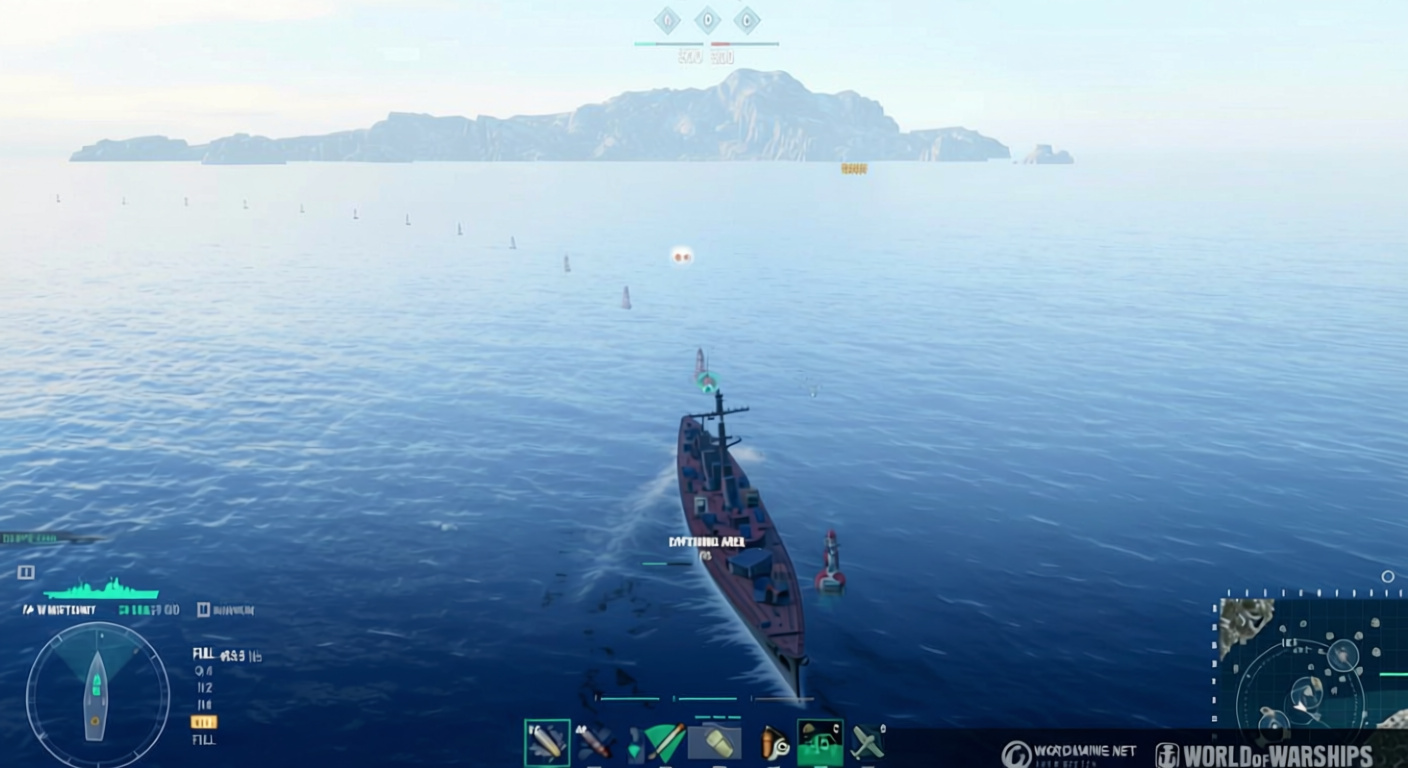
Subs pull off insane damage in World of Warships when you nail the setup – paper-thin armor otherwise. Hours diving these things taught me they rewrite matches entirely. Stealth flanks, torp spreads that gut ships, and that mind game where battleships start dodging ghosts.
Understanding the Submarine Class
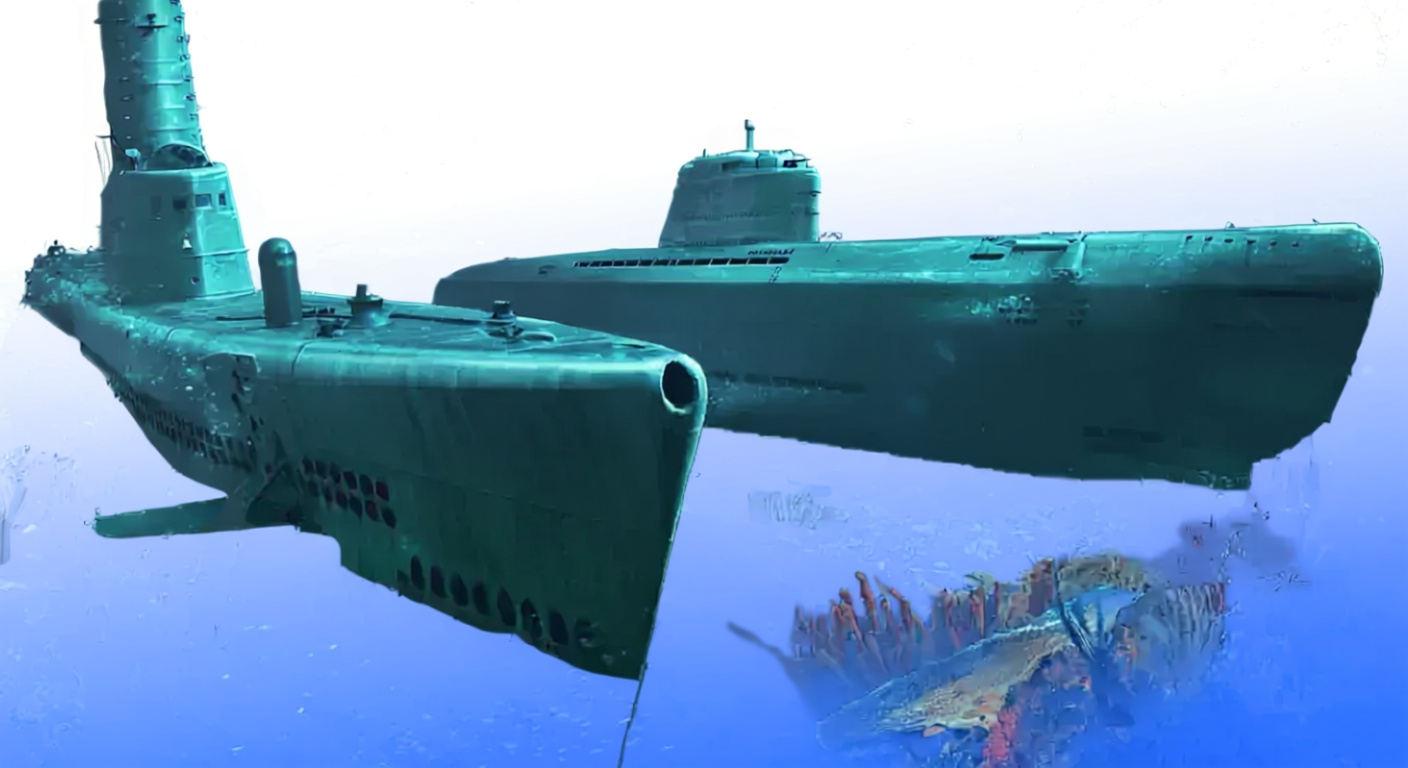
Core Identity & Combat Role
Depth calls, spots, and torp timing decide if you eat or get eaten. Pick off fat targets like sluggish BBs, zoned-out carriers, or solo cruisers while staying off radars. You call the shots on when fights happen. No more chasing – they dance to your tune.
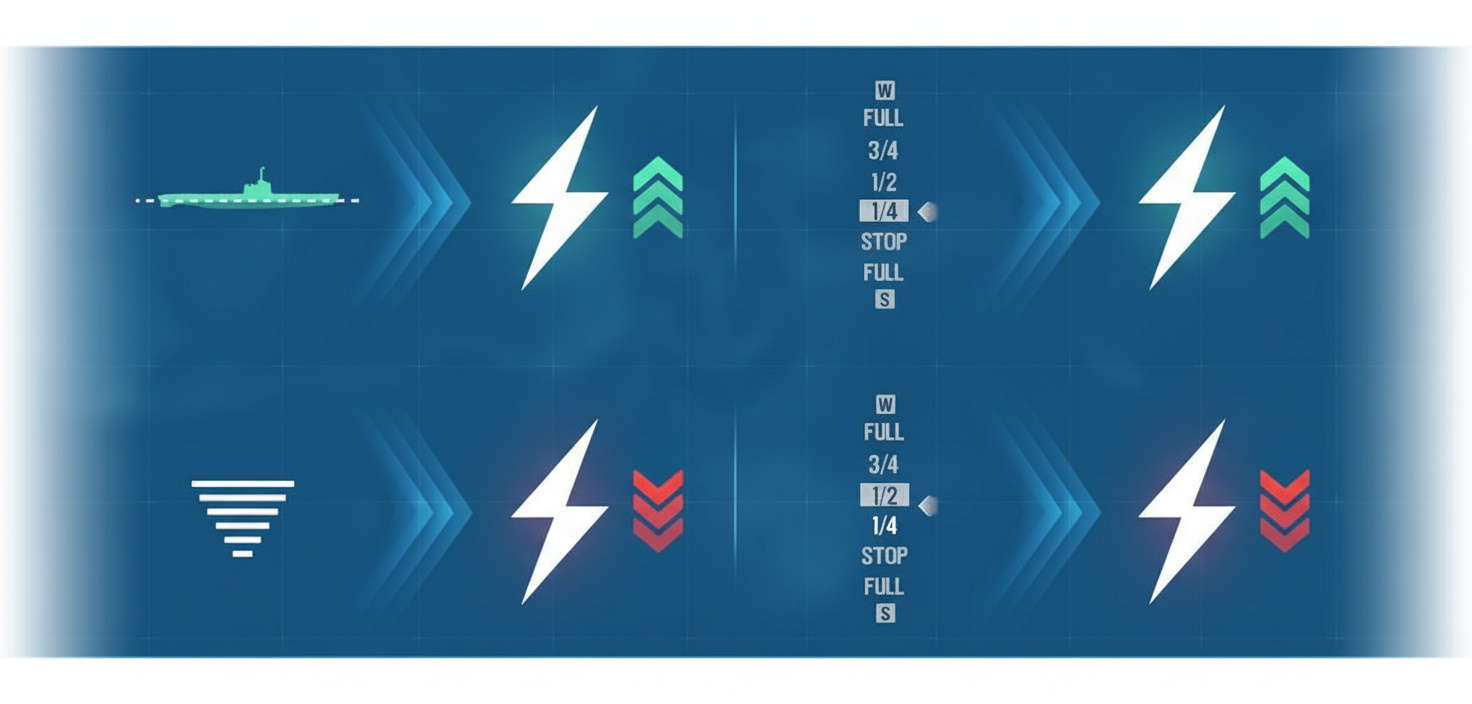
Primary Operational Levels
Depth isn’t fluff – it’s do-or-die gear:
- Surface Level: Topspeed for flank hops, grabs caps, juices battery quickest. But you’re destroyer bait without cover – guns everywhere feast.
- Periscope Depth (6-30m): Hunt zone. Spot range halves, detection too. Line shots, fire, ghost out.
- Deep Combat Depth (30-60m): Vanish act. Team loses your dot, planes blind, DDs drop contact unless breathing down your neck. Crawl speed only – pure hideout.

Strengths That Define Submarine Play
Nail it, and enemies freak over shadows. Your hide forces BBs to weave, burning time, flashing sides to team fire. No one tops the delete potential; full spreads at 4km have wiped healthy BBs clean. Deny caps easy – loiter nearby, DDs bail on your torp bubble.
Critical Vulnerabilities
Screw up once, depth charges mulch you. Good DDs track forever; CV planes at peri depth? Dead meat at high tiers. Impatience kills fastest. No outs from dumb pushes.
Major Submarine Lines & Notable Ships
Nations tweak sub fights different:
Germany
- U-69 (Tier VI): Starter for ambush basics, no overload
- U-190 (Tier VIII): Steps up – quicker reloads, bow/stern mix for angles, better hide
- U-2501 (Tier X): Speed demon for shotgun flanks
- U-4501 (Tier X Premium): Torp blender – four bow, six stern, homing only, heal plus extra juice (stays deep longer); loops firing every way
![]()
![]()
![]()
![]()
United States
VI Cachalot, VIII Salmon, X Balao, X Gato, X Archerfish – balanced workhorses
![]()
![]()
![]()
![]()
![]()
United Kingdom
VI Undine, VIII Sturdy, VIII Alliance, X Thrasher – pinpoint over power
![]()
![]()
![]()
![]()
Japan
VIII I-56 – stealth with options
![]()
USSR
VIII S-189 – tough build, odd consumables
![]()
Pan-Asia
VI Xin Zhong Guo 14 – torp quirks
![]()
Submarine Controls & Interface Mastery
Movement Commands
WASD handles sides. Up/down splits pros from chum:
- F key: Climb
- C key: Drop
- Ctrl+F: Straight climb, no spins
- Ctrl+C: Straight drop, holds course
Surface Operations
Crank speed for zone shifts. Battery fills fastest up top – weigh the risk. Caps only here – back team when clear.
Periscope Depth Workflow
Go-to fight level. Half detection, torp-range sight. Spot, aim, launch, drop. Most kills start here – close strike, quick bail.
Deep Diving Tactics
Under 30m, ghost. No team ping, no planes, hydro fights blind.
Save for:
- Shake DDs
- Duck charges
- Stretch battery (1/4 speed lasts ages)
Battery Management System
Underwater eats juice:
- Pings gulp big
- Fast speeds bleed steady
- Idle still drains slow
Top up:
- Full surface (quick hit)
- 1/4 submerged (creep charge)
Critical Battery Threshold
Zero battery kills pings, not moves. Trick: max dive pre-zero – delays pop-up, dodges charges or repositions.
User Interface Essentials
HUD tracks:
- Battery (watch like hawk)
- Depth (stealth check)
- Spot circle (shifts with depth/ping)
Blow up minimap now (Ctrl+cog) – track DD spots, plane loops, hydro/radar blobs.
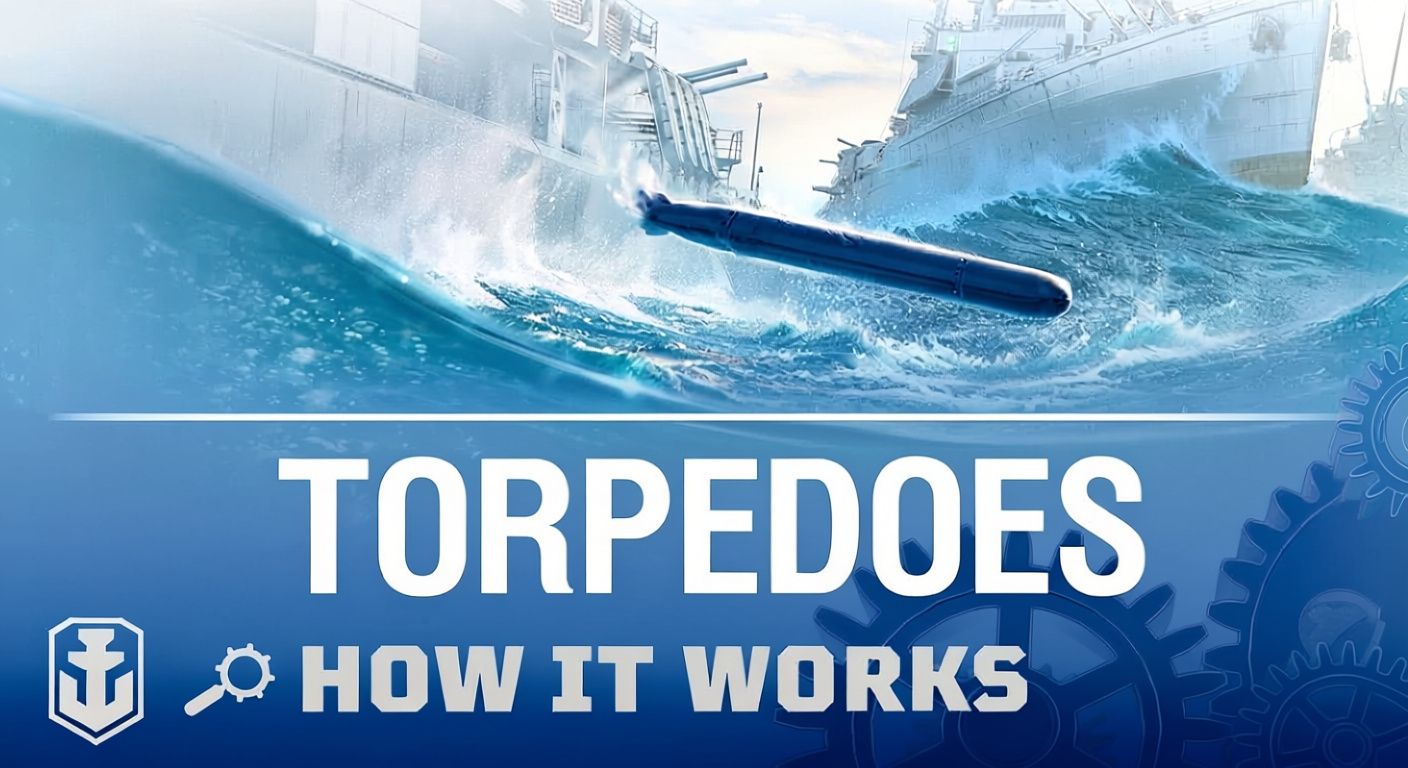
Armament Deep Dive: Torpedo Types & Attack Techniques
Torpedo Arsenal Comparison
| Torpedo Type | Max Range | Damage Per Hit | Guidance Mechanism | Primary Application |
|---|---|---|---|---|
| Homing | 9 km | 4,600 | Sonar ping required | Guided tracking against maneuvering targets |
| Deep-Water/Non-homing | 10.5 km | 14,600 | None – straight trajectory | High-damage ambushes on predictable/slow ships |
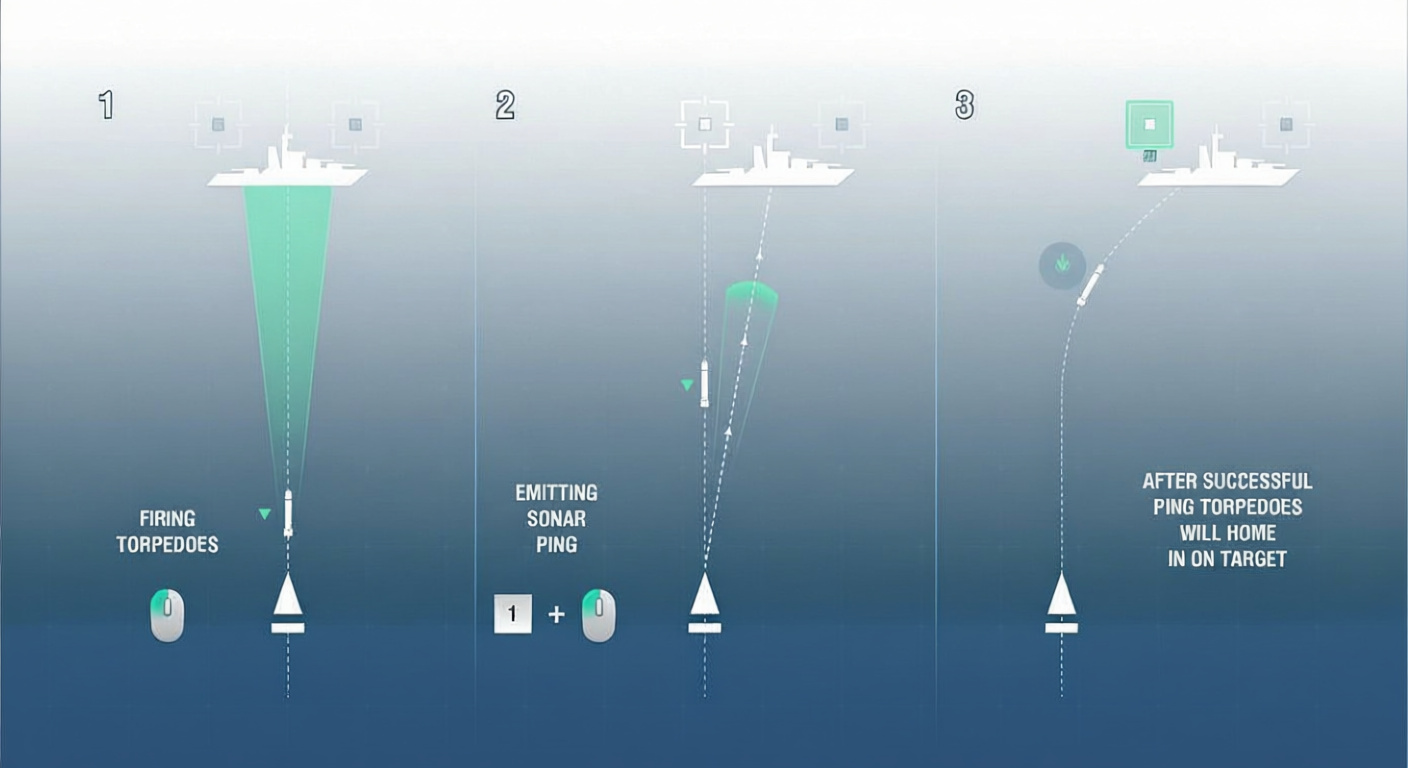
Homing Torpedo Mechanics
Ping to wake ’em – no ping, straight dummies. 4,600 hurts less but chases. Nail bow/stern ping first, they hunt. Second ping dives ’em deep for max pain. Pings stick 30 secs; refresh hits all tubes out.
Non-Homing Torpedo Philosophy
14k punches delete BBs – if they land. Pure aim, lead, pray.
Save non-homing for:
- Shotgun guts (3.5-4.5km, no dodge)
- Flat BB sides
- Straight liners
- Stealth shots, no ping risk
Guidance Disablement Zone
Tracking quits 1km out – straight dash endgame. Wiggly cruisers dodge wakes. Factor that blind spot on zippy targets.
Core Firing Tactics
1. Full-Salvo Broadside Attack
Go-to on lone BBs:
- 80-90° cross to path
- Dump all tubes (best odds)
- Drop deep, shift 2-4km off angle
- Reload en route next spot
Singles don’t cit – floods heal, full swarm breaks ’em.
2. Shotgun Close-Range Deletion
Gutsy flank play:
- Sneak 3.5-4.5km
- Hold peri (low spot bump)
- Non-homing all-in, light/no ping
- Deep dive post-fire
- Short run starves reaction
Crushes BBs lasered on caps. Carriers eating dirt forget subs exist.
3. Donut/Stern-Fire Loop Pressure
Stern-tube specials (U-4501 kings):
- Loop cap/choke
- Bow forward, stern backpedalers
- Nose to main threat (slim target)
- Wiggle dodges charges
Circle denies all angles – ten tubes grind nonstop.
4. Long-Range Pinging Coordination
7-9km plays:
- Fire lead shot first
- Ping mid-flight for guide wake
- Ping lives till torps bite
- No pre-fire waste
30-sec clock demands order.
Sonar Ping System: Strategy vs. Exposure
How Pinging Actually Works
Ping leads like shots – narrow/wide cone. Bow/stern lights:
- First hit: Homes all tubes on it
- Second: Dives deep, amps damage
Full pair maxes wrecks.
Detectability Cost
Pings scream spot:
- Surface: Flare bright
- Peri: Medium glow
- Deep: Low bump, still dicey
Battery hog too – spam ends dives quick.
Strategic Ping Discipline
Ping rules I stick to:
✓ Ping when:
- Clutch deletes (CV, last BB)
- Save doinks
- Bait DC
- Sub duels
✗ Skip when:
- Clean no-ping shot
- DDs/planes close
- Juice under 30%
- Non-homing fits
Vets nail it: ping kills only, lost fish, or DC traps. Spot on – waste gets farmed.
Double-Ping Technique
Bow+stern amps hunt, perfect depth. For:
- Lone fat targets
- Bail path clear
- Battery good
DD-screened BB div? Nope.
Depth Management, Concealment & Battery Conservation
Strategic Depth Usage
Depths like gears – pick right:
Surface gear: Speed king, cap grab, fast juice. When clear:
- No spots near
- Flank crosses
- Juice panic
Periscope gear: Fight sweetspot, stealth/function mix. For:
- Spots/aims
- Torp drops
- Map eyes
Deep gear: Hide button. Hit when:
- DD chase
- Hydro shake
- Charge duck
- Juice stall
Battery Endurance Tricks
Zero forces pop – death if hot. Pro move: max deep pre-dry – stretches delay for dodge/repos. Saved my hide from DD packs.
Detection Mechanics
Hide shifts:
- Surface: 6-7km
- Peri: 3-4km
- Deep: under 2km (ASW only)
Pings puff ’em – surface to 10km+.
Predictability = Death
No ruts. I mix:
- peri strike → deep → quick top → fresh peri
Sit still? Charge bait. Move? Guesswork.
Survival Checklist
Pre-drop:
- DD ranges vs your peri hide (team tips)
- CV loops/hunts
- Cruiser radar/hydro bubbles
- Safe pops by edge/buddies
Flanks start, center suicide.
Consumables, Commander Skills & Optimization

Captain Skill Progression
Build hits hard:
- Liquidator – kill reloads snowball
- Consumable Enhancement – ping/battery stretch
- Watchful – spot/track boost
- Consumable Specialist – surve uptime
- Superintendent – extra juice/surve
- Adrenaline Rush – low HP speed
- Enhanced Propeller – top speed escapes
Tweak for style – aggro grabs rush early.
Module Loadout
| Slot | Module Choice | Purpose |
|---|---|---|
| 1 | Main Battery Modification | Torpedo tube survivability |
| 2 | Engine Room Protection | Critical for engine hits |
| 3 | Dive Capacity Mod I | Extended underwater duration |
| 4 | Submarine Steering Gears | Tighter turning radius (evasion) |
| 5 | Reinforced Bulkheads | Late-tier survivability boost |
| 6 | Dive Capacity Mod II | Maximum battery endurance |
Juice and turns rule.
Signal Flag Recommendations
- Juliet Whiskey: Flood stacker
- Sierra Mike: Topspeed
- X-Ray Papa: Cooldown cut
- Sierra Bravo: Burn/flood hold
Torp/consume focus.
Consumable Variations
Nation/ship shifts – port check. Germans pack:
- DC
- Sub Surve (enemy sub ping)
- Boost/Reserve (varies)
U-4501 heals/juice flips to grinder mode.
Five Core Tactical Principles

Mid push? Feed. Flanks only – low overlap, outs open, BBs solo. Pre-spot ambushes – chase spots you.
One depth? Predictable. Spin:
- peri hit → deep → top → fresh peri
Hydro breaks, charges miss.
Dribble torps? Waste. Engage:
- all tubes
- full send
- bail post-drop
Singles heal easy.
Damage plus eyes:
- hydro spots
- minimap shares
- pings burn DCs
No kills? Still tilt BB repairs for team.
First sub down sets pace. Surve hard start:
- find theirs
- DD/cruiser teamup
- clear waters
Solo undersea now.
Tactical Checklist
Pre-strike:
- ☑ Bail path
- ☑ Juice 40%+
- ☑ No DD/plane near
- ☑ Fat picks (BBs, CVs, solo CLs)
- ☑ Next shift line
- ☑ No 10-sec stalls
Countering Submarines: Defense & Destruction

Destroyer Anti-Submarine Warfare
DD mains scare me most. Their kit:
- Depth charges (G): Drops chain, ok reload
- Hydro Search: Bearings tighten close
- Speed edge: Sticks better than CLs
Counter-tactics
hunted:
- 50m+ drop
- Straight till no spot
- “Clear” then crank
- Blocks/terrain hydro
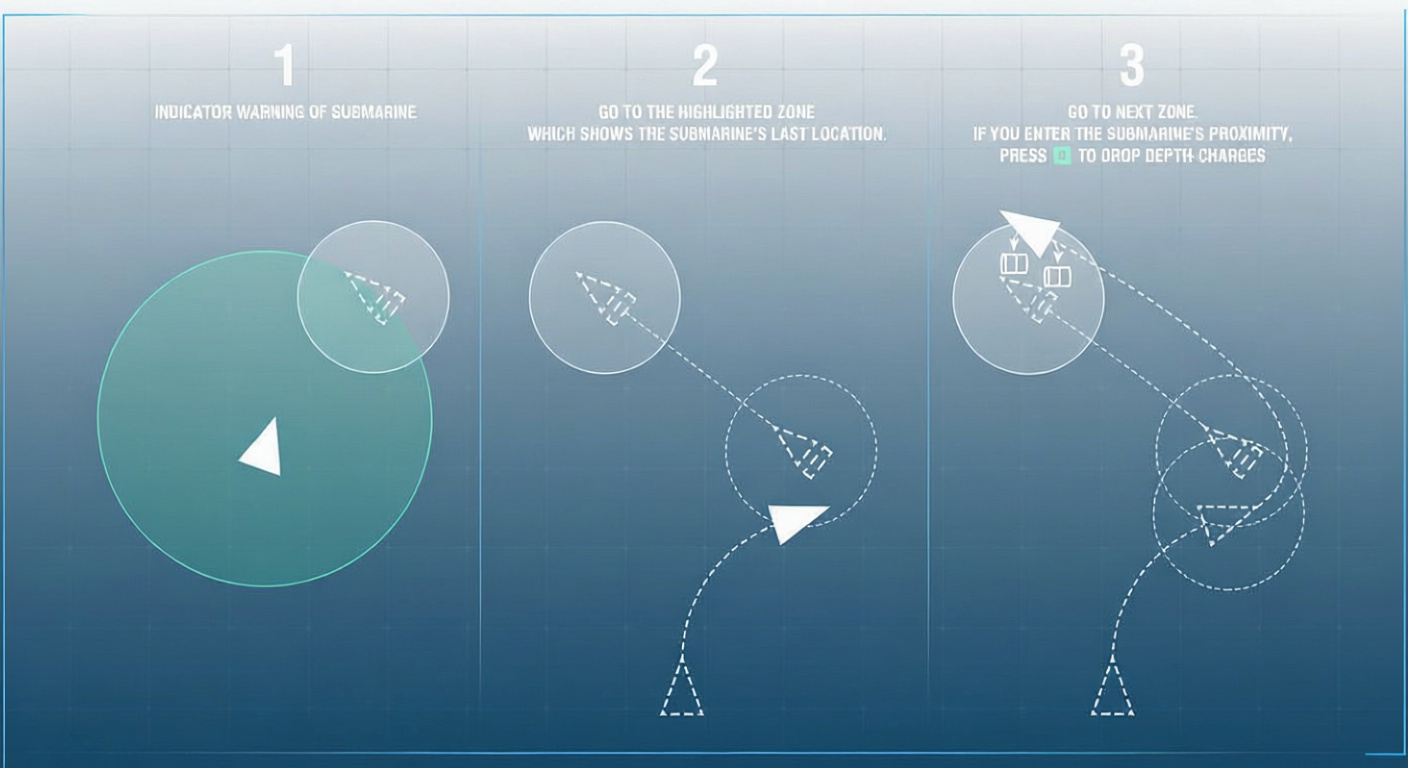
Aircraft Spotting
CV planes track:
- Spotters orbit last ping
- T10 ASW? Peri death
Evasion
- minimap planes
- pre-30m drop
- deep till gone
- no rise under loop
Surface Ship Defense Principles
Sub target?
- Bow/stern to ping – second light tough
- Secondaries on surface – chew HP
- Zig every few secs – mess leads
- Minimap marks – team ASW
Hydrophone Interpretation
Hydro pings:
- Long (4-5km): Loose dir
- Med (2-3km): Tighter cone
- Short (<1km): Pinpoint
Depth Charge Deployment
G on lock. From chased side:
- Reloads gap – team overlap
- Free cam blasts for turns
- Sharp reverses dodge grids
Risk Assessment Priority
Solo sub chase? Bail if:
- Crossfire risk
- Hurt/self fire
- Sub backed
Mark, yell, shift – works.
German U-Boat Line: Detailed Analysis
U-69 (Tier VI) – Foundation Learning
Basic trainer. Ok hide, chill reloads, simple kit.
Grind:
- Depth feel
- Leads/aim
- Juice habits
- Spot basics
Damage meh – mech focus.
U-190 (Tier VIII) – Capability Leap
Real deal:
- Reload pressure
- Bow/stern flex
- Close hides
- Torp swaps
Flank aggro pays – cycles galore.
U-2501 (Tier X) – Surgical Strike Specialist
Speed/stealth peak:
- Quick flanks
- 4km shots
- Delete flanks
Shotgun king – hides to guts.
U-4501 (Tier X Premium) – Sustained Pressure Platform
Tech twist:
Armament: 4 bow + 6 stern (10)
Torpedo restriction: Homing only
Unique consumables: Heal + extra juice
Heal/juice grinds long:
- Tank charges
- Stay deep
- Re-hit
Signature “Donut” Tactic
Cap circles:
- Pick deny spot
- Loop in
- Bow pushers
- Stern runners
- Wiggle charges
- Nose threat
- Heal/juice hold
Torps every way – ten-tube sustain crushes.
Practice, Progression & Community Reality
The Skill Curve Truth
Subs demand 100-300 hours for real games. Starts rough – misses, bad pops, DD farms. Normal.
Builds via:
- Depth auto
- Predict reads
- Map sense
- Juice instinct
No quick wins – steepest curve.
Polarizing Reception
Hate magnet: karma dips, chat rage, “broken” yells. Tune out. Forums over salt.
Practical Learning Resources
This packs it, but add:
- Replay deaths (spot flops)
- Vet guides
- Stat checks vs avg
Why-die patterns speed gains.
Interface Optimization
UI hacks:
- Max minimap (Ctrl+cog)
- Circles on detect/radar/hydro
- Zoom map wide
- Team tips for ranges
Awareness > clicks.
Mechanic Variations & Update Evolution

Guidance Mechanics
Pings wake homing – none, straight all.
T8+ swaps:
- Homing: Ping need, mid dmg
- Non-homing: No guide, big hit
Pick pre-fight.
Close-Range Damage Discussion
Under 3km iffy – unconfirmed. Tests:
- Hits ok
- Arm skips?
- Depth/angle mess
Skip close dice.
Hydrophone System Changes
Old sub hydro gone. Now:
- DD/CL hydro tracks
- Pings no team reveal
- No auto-enemy mark
Less spam, fair counters.
Interface Modernization
Mods ruled old – radar stats sidepanes. Updates bake in:
- Team tips radar/hydro
- Right-ship ranges
- Active circles
Less mod need.
Essential Tactics Summary & Quick Reference
Core Survival Principles
- Flanks spawn, mid death
- Battery hawk – 20% min w/ plan
- Depth random: peri → deep → top → fresh
- BBs top, CVs care, CLs easy
- Early DD skip – team/distraction
- Full drops only
- Bail post-fire
- Outs pre-strike
Signature Attack Sequences
Full-Salvo Ambush:
- Perp setup → all tubes → deep → 2-4km shift → reload move
Shotgun Deletion:
- 3.5-4.5km sneak → non-home dump → light ping → deep → quick wreck
Donut Pressure (stern-tube):
- Cap loop → bow/aft fire → nose threat → move no-charge
Match-Opening Checklist
- ☑ DD ranges
- ☑ CV zones
- ☑ CL radar/hydro
- ☑ Low-threat flank
- ☑ Ambush w/ out
- ☑ Kit/skills set
Target Priority Matrix
Engage immediately: Lone BBs, 6km zoned CVs, hydro-free broad CLs
Engage cautiously: Fighter CVs, DD-backed BBs, hydro CLs
Avoid entirely: DD packs, hunt low DDs, radar stacks
Motivational Reminders
Hide and spot win – stealth beats torp burst.
Peri work, surface speed/juice, deep ghost – cycle owns subs.
Wait beats rush – one clean > three leaks.
Tweak per game. Learn charges, misses, pops. Top subs spot perfect, juice flawless, strike unseen.
Dive in, shift up, spook those BBs.