


Montana nails that classic US battleship vibe – even if she never fired a shot in anger, this Tier X beast dumps insane firepower and tanks hits like nothing else. I’ve racked up endless hours on her twelve 406mm guns, and trust me, she clicks when you hang back smart instead of charging blind. She outdoes Iowa-class ships by packing on size, armor thickness, and that fourth turret. Skip the gimmick-chasing crowd; Montana grinds out wins with straight-up accuracy, a fat HP pool, and broadside alpha strikes that punish sloppy enemies.
Montana Key Stats
| Parameter | Value(s) |
|---|---|
| Hit Points | 96,300 |
| Purchase Price | 20,800,000 credits |
| Research Price | 247,000 XP |
| Main Battery | 406 mm/50 Mk.7 (4 × 3) |
| Main Battery Reload | 30 s |
| Main Battery 180° Turn Time | 45 s |
| Main Battery Firing Range | 17.4 km (Legends); 23.65 km (wiki) |
| Main Battery Max Dispersion | 296 m |
| Main Battery HE Max Damage | 5,700 |
| Main Battery HE Fire Chance | 36% |
| Main Battery HE Velocity/Weight | 820 m/s; 862 kg |
| Main Battery AP Max Damage | 13,500 |
| Main Battery AP Velocity/Weight | 762 m/s; 1,225 kg |
| Secondary Armament | 127 mm/54 Mk.16 (10 × 2) |
| Secondary Firing Range | 5.0 km (Legends); 7.3 km (wiki) |
| Secondary ROF/Reload | 15 shots/min; 4 s |
| Secondary HE Max Damage | 1,800 |
| Secondary HE Fire Chance | 9% |
| AA Suite | Multi-layered (see breakdown below) |
| Maximum Speed | 30 knots |
| Turning Circle Radius | 950 m |
| Rudder Shift Time | 22.2 s (stock) |
| Surface Detectability | 17.29 km (wiki); 16 km (Legends) |
| Air Detectability | 12.91 km (wiki); 12.8 km (Legends) |
| Detectability in Smoke | 17.38 km (wiki); 15.5 km (Legends) |
| Torpedo Protection | 37% (Legends) |
That “jack of all trades” tag fits Montana loose, but it misses her edge. No superheal like Conqueror, no torps on rivals. Still, steady damage, tankiness that drags fights out, and easy handling keep her carrying Tier X queues.
Flaws hit direct: stock 22.2s rudder shift hurts dodging bad. Stealth sucks for a battleship. Broadside? Gone in one salvo. Shells crawl too, so lead big after a few games.
Devastating Firepower Through Twelve Guns
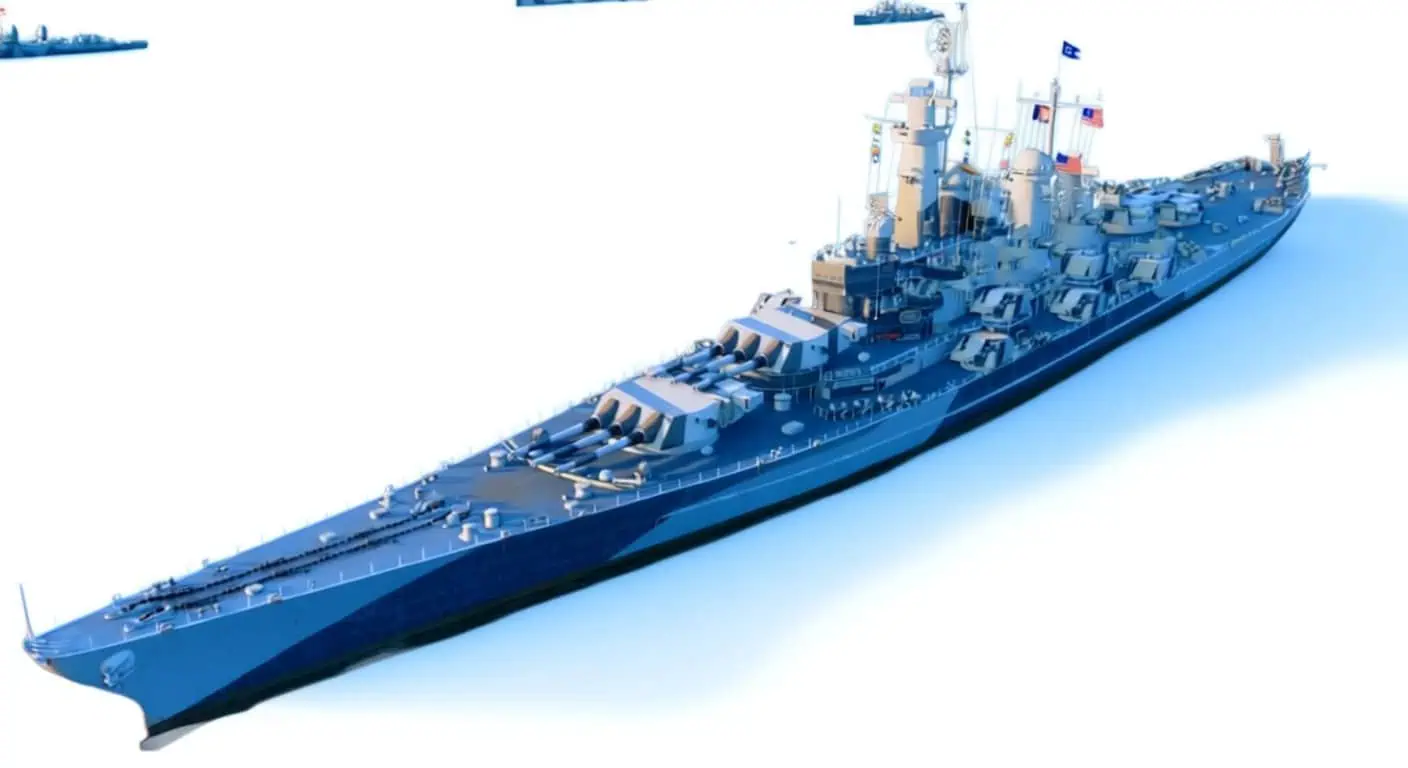
Four triples mean Montana slaps one of the game’s fattest AP broadsides.
Twelve 406s every 30s feels vanilla till shells connect steady where others spray wide. AP maxes 13,500 at 762 m/s muzzle. HE does 5,700 with 36% fires – solid, but British or German stuff laughs harder. Stick to AP on angles, wait for broadsides to delete. No 30mm overmatch bites. Bows on Kremlin or Conqueror shrug you; Yamato punches clean. Hunt citadels broad or farm supers on angles. Pick targets sharp, stay patient.
Shells take forever – 10s to 16km targets. Lead cruisers heavy. But dispersion shines; shells cluster where Germans splash ocean. Upgrades lock it in. Angles rock – you angle 20-30° and keep guns hot. Front pair free, rears need tiny broad to fire.
Ten twins of 127mm (20 total) reach 5-7.3km, 15 rpm, 1,800 HE, 9% fires. Skip secondary builds. She’s no brawler; those pop low DDs at best.
Anti-Aircraft Defenses
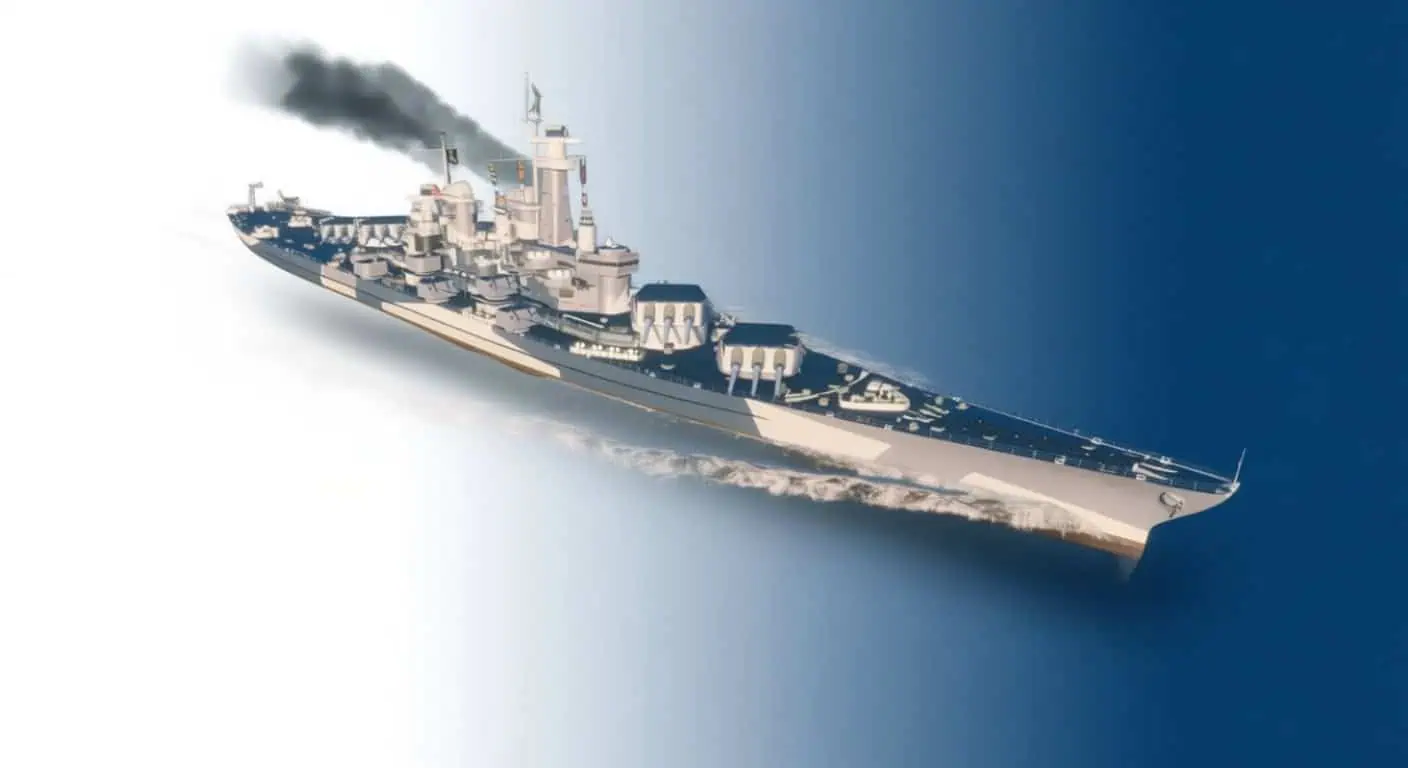
Montana’s AA shreds squadrons, making carriers pause. Layers from 127mm out to Oerlikons overlap nasty.
Montana AA Suite
| Mount Type | Quantity | DPS | Range |
|---|---|---|---|
| 127 mm/54 Mk.16 | 10 × 2 | 157 | 5.19-5.2 km |
| 40 mm/56 Bofors | 20 × 4 | 318 | 3.5-3.51 km |
| 20 mm Oerlikon Mk20/Mk4 | 20 × 2 / 20 × 1 | 122 / 72 | 2-2.01 km |
Bofors mid bubble chews 318 DPS at 3.5km – death for most drops. 127s warn early, Oerlikons mop close. Port stats beat sidebar glitches.
AA skills and mods turn her carrier poison. Priority sector plus allies? Planes melt. Long 127s force commits or bailouts. Team up two? Forget strikes.
Maneuverability, Armor, and Staying Power
Stock rudder shift? Trash at 22.2s – worst Tier X. Torp spreads or salvos demand god-tier reads.
30 knots solid, 950m circle locks you committed. Position perfect or eat pain. Steering Gears 2 cuts 20% to ~17.8s – must-have unless you like sitting ducks. Emergency Response trades stealth for even snappier turns.
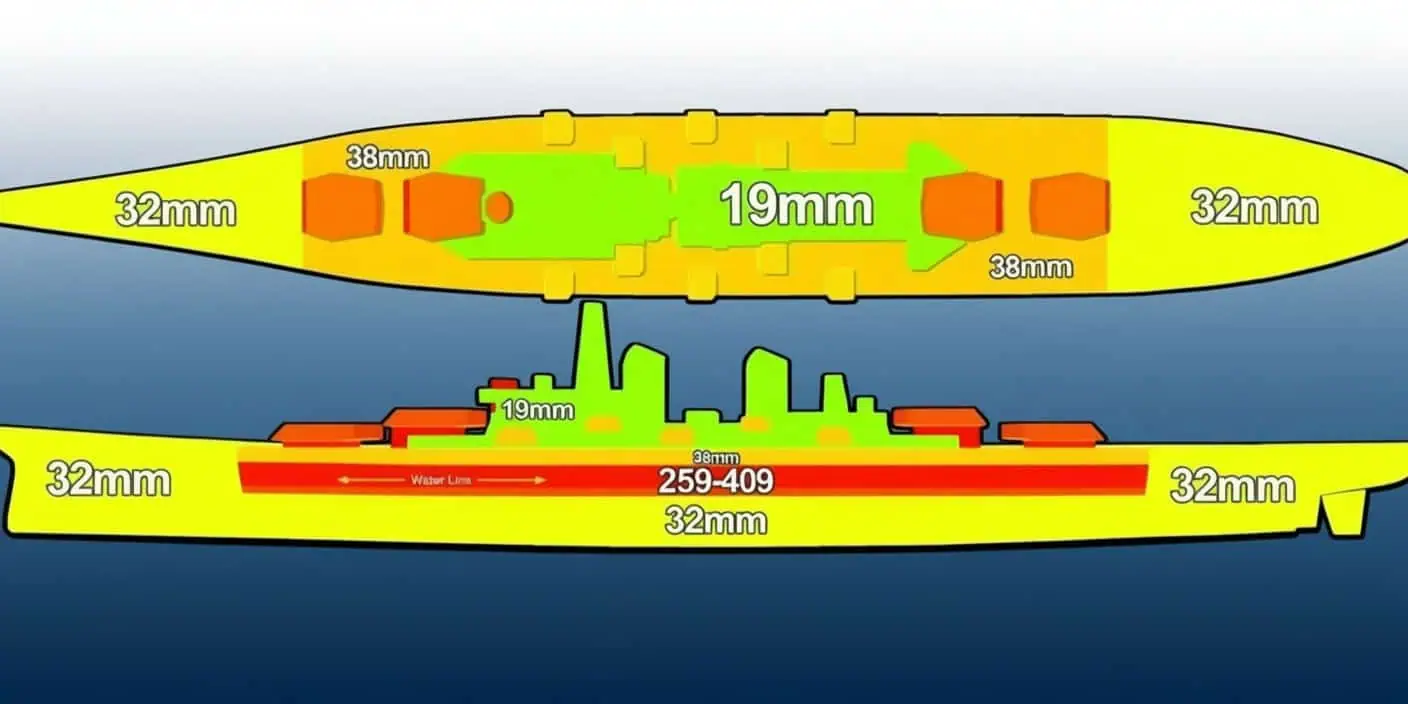
Armor crushes: 457mm belt spots, 38mm deck buffed up, citadel dropped in 0.6.6 with casemate HP shift. Broadside still nukes, but angled? Bounces galore. 37% torp reduction holds one-two spreads angled right. No cap charger.
96,300 HP plus beefed Repair Party (0.66% vs 0.5% peers) sustains forever. Save for late pushes where bulk rules.
Concealment and Detection Radius

Stealth? Awful. Wiki 17.29km surface, Legends 16km – spotted map-wide. BBs, cruisers, DDs light you first. Air 12.91/12.8km – CVs tag you early. No lurking. Smoke fire? 17.38/15.5km – pointless spotlight.
Play it straight: no flanks, no hides. 12-15km fights, need DD/cruiser eyes. Read mini, anchor smart – flank locked once picked. CE and mod shave ~10%, still trash. Own it: be obvious but angled deadly.
Consumables and Strategic Usage
Consumables win if timed right – waste early, regret late.
Damage Control Party: 20s up, 80s back, unlimited. Skip single fires. Multi or killer flood? Slam it. Foes time pops – burn first, force waste.
Repair Party: 481/s over 28s, 80s reload, 3 charges. ~13k per pop. Disengage at 25-35% loss, heal safe. No panic at 90%.
Catapult Fighter: 90s circle, 80s reload, 6. CV spam only; spotter beats otherwise.
Spotting Aircraft: +10% grouping, 30s, 200s reload, 6. Cooldown gold – vision, torp spots, range stretch.
Enhanced Secondary Targeting: 100% group/50% dispersion 30s, 160s, 3. Brawl desperation only.
Cycle smart: heals endgame, spotters engage starts. Investments pay.
Optimal Upgrades and Modules

Modules flip handling – pick wrong, suffer.
Montana Recommended Upgrades
| Slot | Upgrade Option(s) | Effect/Notes |
|---|---|---|
| 1 | Main Armaments Modification 1 | Reduces chance of main battery incapacitation – basically mandatory since losing guns is crippling |
| 2 | Damage Control System Modification 1 | Cuts fire and flood duration, reducing damage over time substantially |
| 3 | Main Battery Modification 2 / Secondary Battery Mod 2 | Main option gives +20% turret traverse (recommended); Secondary variant increases range and accuracy but Montana’s not built for this |
| 4 | Damage Control System Mod 2 / Steering Gears Mod 2 | Steering Gears reducing rudder shift by 20% is practically mandatory – Montana’s handling is too sluggish otherwise |
| 5 | Concealment System Modification 1 / Reinforced Emergency Response | Concealment is standard pick for -10% detection; Emergency Response gives massive rudder improvement and fire/flood resistance but kills concealment entirely |
| 6 | Artillery Plotting Room Modification 2 | Reduces main battery dispersion by 10% – this is absolutely essential for Montana’s accuracy advantage |
Slot 1 locks turrets safe. Slot 2 starves DoT. Slot 3: Main Mod 2 speeds traverse standard. Sec trap. Slot 4: Gears 2 turns brick nimble – skip DCS2. Slot 5 fork: Conceal safe shave, Response aggressive handling/fire fix. Spotted anyway? Response. Slot 6 must: Plot Room tightens shells key.
My go: Arms1, DC1, Main2, Gears2, Response, Plot2. Handling over hide suits push style. Cautious? Conceal slot5.
Commander Skills for Montana
Skills split good from carry – value picks only.
Commander Skills Breakdown
| Tier | Skill Name | Effect Summary | Usefulness |
|---|---|---|---|
| 1 | Gun Feeder | -40% shell switch time | ★★ |
| 1 | Demolition Expert | +1% HE fire chance, +15% ASW area | ★ |
| 1 | Consumable Specialist | -7.5% consumable cooldown (not DCP/Repair) | ★★ |
| 1 | Emergency Repair Specialist | -3% DCP/Repair cooldown | ★★ |
| 1 | Preventive Maintenance | -30% module incapacitation, +15% sec/AA HP | ★★ |
| 2 | Grease the Gears | +20% turret traverse | ★★ |
| 2 | Inertial Fuse for HE Shells | +25% HE penetration, -50% base fire chance | ★ |
| 2 | AAA & ASW Expert | +15% AA/flak, +10% depth charge, -40% consumable reload when AA active | ★★ |
| 3 | Adrenaline Rush | -0.2% reload per 1% HP lost, +0.2% AA per 1% HP lost | ★★★ |
| 3 | Basics of Survivability | -15% repair/fire/flood duration | ★★ |
| 3 | Improved Repair Party Readiness | -0.8% Repair Party reload per 100% HP potential damage; +1 charge after 2M potential damage | ★★ |
| 3 | Focus Fire Training | Priority AA sector bonuses | ★★ |
| 4 | Furious | First fire/flood -10% main battery reload; subsequent up to -5% per stack | ★★ |
| 4 | Emergency Repair Expert | +1 DCP/Repair charge, +10% action time | ★★★ |
| 4 | Concealment Expert | -10% detectability | ★★★ |
| 4 | Fire Prevention Expert | -10% fire risk, max 3 fires | ★★★ |
Tier1: Feeder swaps fast for broad punishes. Repair/Consumable speed heals/spots – pick need. PM saves modules. Tier2: Gears wakes turrets. AA Expert stacks CV pain. Tier3: Rush core – 50% HP? 10% faster fire. Survive cuts DoT stacks mods. Repair Readiness tanks for extras. Tier4: Repair Expert extra charges/longer. CE standard. Fires max3? HE nightmare gone.
Core: Feeder, Repair Spec, Gears, Rush, Survive, Repair Expert, CE, Fires. Balanced killer. AA alt: PM, AA Expert, Focus, Repair Expert, CE, Fires. CV shredder. Brawl: Feeder, Gears, Rush, Repair Readiness, Furious, Repair Expert. Burn boosts damage.
Signal Flags for Maximum Effectiveness
Flags edge wins – priorities clear.
Recommended Signal Flags
| Signal | Effect | Usefulness |
|---|---|---|
| Charlie Kilo | +5% ship HP, +2.5% squadron HP | ★ |
| Juliet Yankee Bissotwo | -20% flooding duration | ★★ |
| India Yankee | -20% fire duration | ★★★ |
| Hotel Yankee | -20% ramming damage received, +50% ramming damage dealt | ★ |
| Victor Lima | +1% HE fire chance (>160mm), +0.5% (<160mm), +4% torp flood | ★ |
| India X-Ray | +1% HE fire chance (>160mm), +0.5% (<160mm) | ★ |
| Juliet Whiskey Unanone | +15% flooding chance | ★★ |
| Mike Yankee Soxisix | +5% secondary range, -5% dispersion, -5% reload | ★ |
| November Echo Setteseven | +5% AA damage, +5% flak damage | ★ |
| Sierra Mike | +5% max speed | ★★ |
| November Foxtrot | -5% consumable reload | ★★ |
| India Delta | +20% HP recovered with Repair Party | ★★★ |
| Sierra Bravo | +10% Hydro duration, -10% Defensive AA reload | ★ |
Must: Yankee fire -20% stacks mods saves tons. Delta heal +20% ~16k pops. High: Bissotwo floods, Mike speed 31.5kts repositions, Foxtrot cooldowns. Sit: Echo AA CVs, Whiskey torps meh. Dump: Lima/Xray HE waste on AP spam, Soxsix sec joke. Load: Yankee, Delta, Bissotwo, Mike, Foxtrot. Tank max, move fast. CVs? Echo swap.
Playing Montana: Positioning and Decision-Making
Core loop: 12-15km punish, team support, foe errors. Nail it for 100k+; botch, die mad.
The 12-15 Kilometer Sweet Spot
Shells land quick, torps miss, broads delete. Accuracy peaks. Under 12km torp hell – can’t dodge. Flat angles pen easy. Over 15km dodges eat output. Spotter for 16-18km bursts.
Use Your Team as a Screen
Solo? Dead. DDs spot, cruisers deny – lurk rear, delete tunnelers. DD lit? Guns hot on hides. Cruisers push? Broadside free.
Angle, Then Angle Some More
20-30° bounces most. Bow biggest threat, sides sec. 8-10 guns angled – train it.
Vary Speed and Course Constantly
Straight line? Free hits. Half-flank zig 5-10° every 15s, splash dodge hard.
Consumable Timing
Spotter engage start – 6+ uses. DCP multi only. Heal disengage 25-35%.
Target Priority: Who Dies First
DDs first – spot kill map win. Broad cruisers dev. Angle BBs farm till slip.
Preserve HP for Late Game
Conserve early, bully late. 60% + heals > 30% dry.
Avoid Chokepoints
Tight spots trap turns, torps. Open water kite room.
Patience Wins Games
Wait broads, overextends. 5min full HP? Unstoppable. Rush? Torp food. 16km 10s travel – lead cruisers ahead. Angle halves damage 15k to 5k.
Montana Build Variations
Styles shift – full kits.
Standard Competitive Build (Maximum Consistency)
Modules:
- Slot 1: Main Armaments Mod 1
- Slot 2: Damage Control System Mod 1
- Slot 3: Main Battery Mod 2
- Slot 4: Steering Gears Mod 2
- Slot 5: Concealment System Mod 1
- Slot 6: Artillery Plotting Room Mod 2
Commander Skills:
- Tier 1: Gun Feeder, Emergency Repair Specialist
- Tier 2: Grease the Gears
- Tier 3: Adrenaline Rush, Basics of Survivability
- Tier 4: Emergency Repair Expert, Concealment Expert, Fire Prevention Expert
Signal Flags: India Yankee, India Delta, Juliet Yankee Bissotwo, Sierra Mike, November Foxtrot
All-rounder queues any mode. Hide disengages, fires shrug, heals clutch.
Aggressive Positioning Build (Reinforced Emergency Response)
Modules:
- Slot 1: Main Armaments Mod 1
- Slot 2: Damage Control System Mod 1
- Slot 3: Main Battery Mod 2
- Slot 4: Steering Gears Mod 2
- Slot 5: Reinforced Emergency Response
- Slot 6: Artillery Plotting Room Mod 2
Commander Skills:
- Tier 1: Gun Feeder, Emergency Repair Specialist
- Tier 2: Grease the Gears
- Tier 3: Adrenaline Rush, Improved Repair Party Readiness, Basics of Survivability
- Tier 4: Emergency Repair Expert, Fire Prevention Expert, Furious
Signal Flags: India Yankee, India Delta, Juliet Yankee Bissotwo, Sierra Mike, November Foxtrot
Hide gone, turns snap, DoT laughs. Furious burns boost. Spotted pushers.
Anti-Aircraft Specialist Build
Modules:
- Slot 1: Main Armaments Mod 1
- Slot 2: Damage Control System Mod 1
- Slot 3: AA Guns Mod 3
- Slot 4: Steering Gears Mod 2
- Slot 5: Concealment System Mod 1
- Slot 6: Artillery Plotting Room Mod 2
Commander Skills:
- Tier 1: Preventive Maintenance
- Tier 2: AAA & ASW Expert, Vigilance
- Tier 3: Adrenaline Rush, Focus Fire Training
- Tier 4: Emergency Repair Expert, Concealment Expert, Fire Prevention Expert
Signal Flags: India Yankee, India Delta, November Echo Setteseven, Sierra Mike, November Foxtrot
CV hell – 25% AA mod, 15% skill, 5% flag. Fighter consumable. Drops delete.
Survivability Tank Build
Modules:
- Slot 1: Main Armaments Mod 1
- Slot 2: Damage Control System Mod 1
- Slot 3: Main Battery Mod 2
- Slot 4: Damage Control System Mod 2
- Slot 5: Reinforced Emergency Response
- Slot 6: Artillery Plotting Room Mod 2
Commander Skills:
- Tier 1: Emergency Repair Specialist, Consumable Specialist
- Tier 2: Grease the Gears
- Tier 3: Adrenaline Rush, Basics of Survivability, Improved Repair Party Readiness
- Tier 4: Emergency Repair Expert, Fire Prevention Expert
Signal Flags: India Yankee, India Delta, Juliet Yankee Bissotwo, Charlie Kilo, November Foxtrot
DoT stack hell – mods, skills, flags. Extra heals tank teams. Slow but immortal flank hold.
Strengths and Limitations
What Montana Does Exceptionally Well:
- AP broadside crushes – top Tier X with Shikishima pack. 20-40k broads routine.
- Range stretches 18+km spotted. Angles keep 8-10 guns angled perfect.
- 96k HP, 32% better heals, low cit, 37% torps – outlasts all.
- AA bubbles 5km – 3-4 planes lost per drop. Doubles? CV bye.
Where Montana Falls Short:
- HE weak – 5.7k/36% loses to Conq/Repub fire farms.
- Rudder stock kills dodges – 17.8s mod still sluggish.
- Broad citadels nuke 30-50k.
- Secondaries silent – range/dispersion trash.
- Stealth worst – 15.6km max, commits hard.
- No gimmicks – pure skill, no crutches. Boring to some, steady wins.
Historical Montana-Class Design
Montana evolved Iowa max – fire/protect over speed.
2026 spec: 63k tons standard, 71k full. 281m long, 37m beam, 11m draft. Yamato rivals.
8 boilers, 4 turbines, 172k shp, 28kts real (30 game). Early 212k/29+ dropped.
12x 406/50 Mk7 triples. 20x 127/54 twins sec. 32x40mm, 20x20mm light AA growable.
3 Kingfishers, 2 cats recon/spot.
Why They Were Never Built
5 approved: Montana etc. Pre-WWII start, Pearl shifts. Carriers Coral/Midway rule. 28kts lags Essex/Iowa 33. Canceled 2026 for urgent builds.
In-Game Inaccuracies
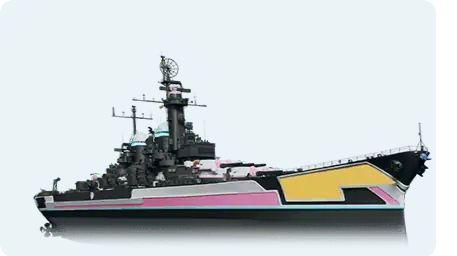
30kts vs 28. Deck 38/150 early vs 57/179-84. Steering behind citadel real. Bow AA missing. Dazzle fake – Measure 22 gray real 2026.
Game Updates and Evolution
Landed 0.3.1 original T10. Patches tuned heavy.
Major Statistical Changes:
| Patch | Change Summary |
|---|---|
| 0.5.2 | +4.71s rudder realer. |
| 0.5.6 | buffs: AA/sec strong, acc up, 28-30kts, sec 5-6km, AA remounts DPS+. |
| 0.5.9 | armor tweak. |
| 0.5.12 | deck 28-38mm dive resist. |
| 0.6.0 | AA/turret bug/armor fix. |
| 0.6.6 | cit drop, casemate HP – survive king. |
| 0.6.12 | smoke fire 17.38km. |
| 0.6.13 | AA HP standard. |
| 0.9.0 | heal 0.5-0.66%. |
| 0.9.5 | EDC nerf fires 15-10%, floods 30-10%. |
| 0.9.6 | circle 950m fix. |
| 0.10.0 | sec 7.3km. |
Legends-Specific Changes:
Gold/Crimson AP 13.1-13.5k, HP 86.6-96.3k – PC edge lost.
Geo/text fixes endless – turrets, AA, camos.
Player Community Perspectives
Montana pop T10 pick – consistent queen. Jack all? Yeah, but no weak links. Legends tags reach/guns/tough spot-on. Clans meta shift: angles/dura hot, she shines; gimmicks? Kremlin/Conq. Randoms strong – forgiving, high ceil. Newbies live errors, pros carry. Patience mantra. Aggro dies dry. Rudder whine eternal – slug over zip.
Visual Development
Model grinded fine – detail super, AA right, wear real. Perms histo/events. Crocosour 12.3 hull fix. Cuts/studies ’40-44, turret slices, stern cats/crane docs. Pics/port scream huge – scale hits.
Montana pure US BB peak: gun walls, tank core, smart grind. No flash, just results – damage steady, spots owned right. Tier X done right.
