


Navigation in Sea of Thieves trips up more pirates than any skeleton or storm ever could. You’ve got a treasure map in your hand, you’re staring at an island, and nothing matches. That feeling? Completely avoidable – once you understand how every map type works and what each one is actually telling you.
I’ve put together everything here: every charted island, every Tall Tale step, every trade route trick, and every practical navigation tip you’ll ever need. Bookmark this page, because you won’t need to go anywhere else.
Map Types and Their Uses
Sea of Thieves doesn’t have just one “map” – it has an entire system of different cartographic tools, each serving a specific purpose. Mixing them up is where most confusion starts.
- The Ship’s Map Table sits on your lower deck and shows the entire world at once. Think of it as your compass and atlas combined – your vessel’s current position, its orientation, and every named island across all four regions. It’s not interactive in the fancy sense; it’s just raw, honest navigation data.
- Treasure Maps are the romantic, old-school kind – hand-drawn outlines of island shapes with an X marking buried loot. They don’t give you coordinates. They give you a silhouette and trust you to figure the rest out yourself.
- Voyage Maps come from quest tables and cover the four main trading companies:
- Gold Hoarders send you after buried chests using those silhouette-style riddle and treasure maps.
- Order of Souls wants skulls, directing you toward skeleton captain locations.
- Merchant Alliance assigns cargo runs with destination markers.
- Hunter’s Call covers fishing quests with their own dedicated map type.
- Event Maps appear during special game modes. Last Ship Standing, for example, uses a war map on your quest table – you interact with the Hourglass of Fate to pledge allegiance to a faction, then vote to battle from there.
- Fishing Maps split into two varieties worth knowing cold:
- Pirate’s fishing map – guarantees exactly one fishing spot.
- Hunter’s fishing map – guarantees two fishing spots, with three fish per spot, and no bait required for the special species you’ll find there.
- Commodity Maps tie into Merchant Alliance trade routes and show surplus versus shortage goods across outposts. More on the profit mechanics in the trade routes section below.
- Interactive Maps – third-party tools built by the community – layer everything onto the world map simultaneously: Tall Tale locations, shipwrecks, animal spawns, vault entrances, ziplines, and cooking spots. They support custom markers, commendation tracking, and shareable map links. Everything you’d want as a reference lives in those tools, with filters to show or hide whatever you need at any given moment.
Navigating the World Map
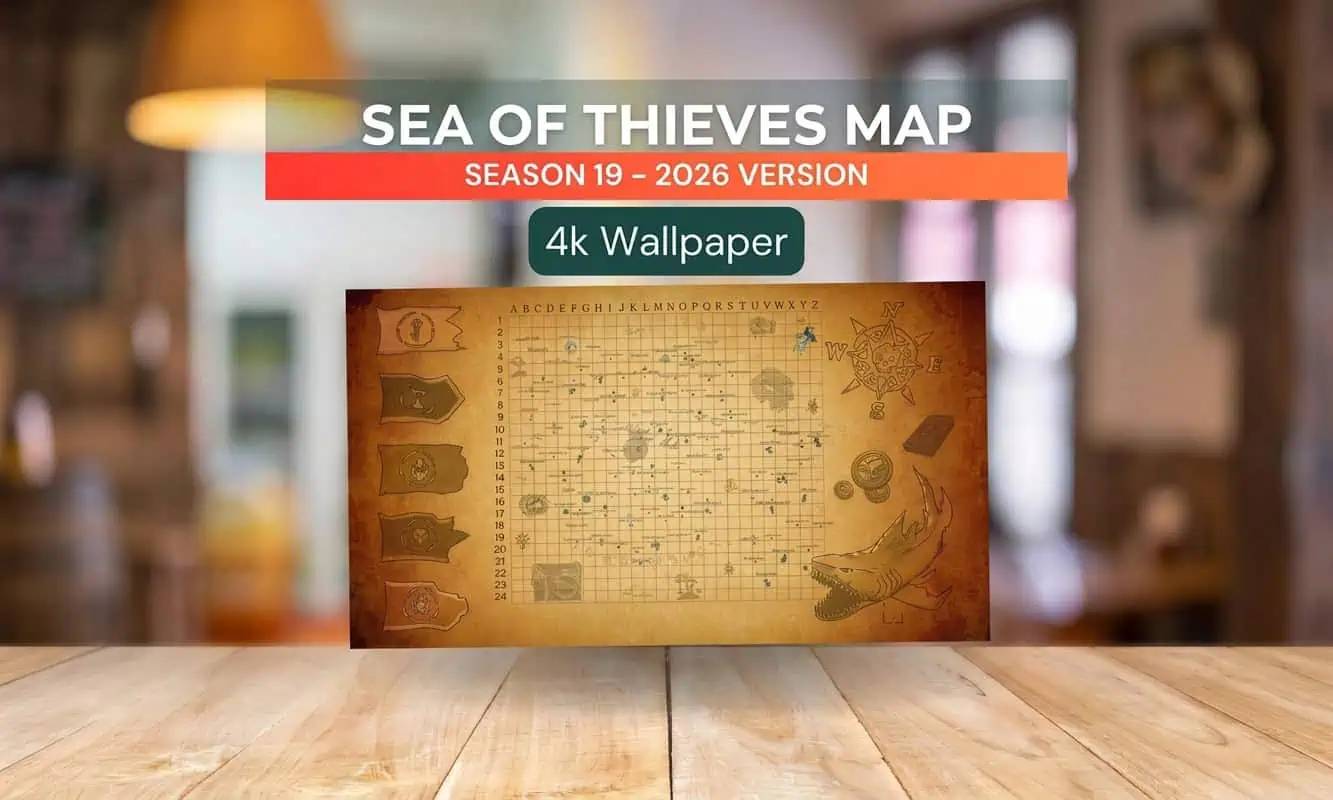
The map table lives on your ship’s lower deck – that’s your first stop before any voyage and your check-in point throughout.
What it shows you:
- Your current position on the world grid.
- Your ship’s orientation (which direction the bow is pointing).
- Every named island across all regions.
Zooming in turns a vague cluster of coastlines into readable detail that actually helps you pinpoint specific dig locations or approach angles. On keyboard, press F; on PS4, it’s Square; on Xbox, use X.
For solo players, the map table creates a real challenge. You’re constantly moving between the helm upstairs and the table below – checking position, correcting course, heading back up, repeating. It feels tedious until it becomes habit. Accept the rhythm early.
One piece of advice that genuinely changes how you navigate: always look at the map before approaching an island, not after. Specifically, check which side you’re coming in from. That context – arriving from the north versus the east, say – completely changes how the island silhouette lines up with what you see on a treasure map.
Identifying Islands and Landmarks
This is where new players lose the most time. A treasure map hands you an island outline and an X. Nothing else. Here’s how to actually use that.
Step-by-step island identification:
- Open your treasure map and study the overall shape – is it long and thin? Round with a peninsula? Irregular with a distinctive bay?
- Open the ship’s map table and scan the world map for islands matching that silhouette.
- Pay attention to which region you voted your quest in – quests always spawn near where you accepted them. If you voted in The Wilds, search The Wilds first. No reason to scan the entire chart.
- Once you’ve narrowed it down to two or three candidates, zoom in on each using the table controls.
- Sail toward the most likely match and approach from the correct side (the side your X appears on relative to the island shape).
- On the island itself, find something recognizable from the map – a distinctive rock formation, a cluster of trees, a specific pathway or beach curve.
- Line that feature up with your map, then pace toward the X.
When you’re genuinely stuck, there’s a field technique that actually works: bury a piece of treasure somewhere on the island yourself, then look at where that burial X appears on your map compared to the X you’re hunting. The comparison gives you a reference point. Trial and error from there gets you surprisingly close.
The key insight from experience: getting the right island is easy once you know the quest region; going the right distance from your landmark toward the X is the hard part. Direction comes naturally. Distance takes practice.
Complete List of Islands and Locations
74 charted islands fill the Sea of Thieves, split across 25 large islands, 39 small ones, and 10 Skeleton Forts. Large islands carry riddle maps because they have enough unique landmarks. Small islands don’t qualify for those – but still hold secrets, enemies, and plenty of buried loot.
Large Islands
| Name | Grid | Region | Chickens | Pigs | Snakes |
|---|---|---|---|---|---|
| Cannon Cove | G-10 | The Shores of Plenty | ✔ | ✔ | |
| Crescent Isle | B-9 | The Shores of Plenty | ✔ | ✔ | |
| Lone Cove | H-6 | The Shores of Plenty | ✔ | ✔ | |
| Mermaid’s Hideaway | B-13 | The Shores of Plenty | ✔ | ✔ | |
| Sailor’s Bounty | C-4 | The Shores of Plenty | ✔ | ✔ | |
| Smugglers’ Bay | F-3 | The Shores of Plenty | ✔ | ✔ | |
| Wanderers Refuge | F-12 | The Shores of Plenty | ✔ | ✔ | |
| Crook’s Hollow | M-16 | The Ancient Isles | ✔ | ✔ | |
| Devil’s Ridge | P-19 | The Ancient Isles | ✔ | ✔ | |
| Discovery Ridge | E-17 | The Ancient Isles | ✔ | ✔ | |
| Plunder Valley | G-16 | The Ancient Isles | ✔ | ✔ | |
| Shark Bait Cove | H-19 | The Ancient Isles | ✔ | ✔ | |
| Snake Island | K-16 | The Ancient Isles | ✔ | ✔ | |
| Thieves’ Haven | L-20 | The Ancient Isles | ✔ | ✔ | |
| Kraken’s Fall | R-12 | The Wilds | ✔ | ✔ | |
| Marauder’s Arch | Q-3 | The Wilds | ✔ | ✔ | |
| Old Faithful Isle | M-4 | The Wilds | ✔ | ✔ | |
| Shipwreck Bay | M-10 | The Wilds | ✔ | ✔ | |
| The Crooked Masts | O-11 | The Wilds | ✔ | ✔ | |
| The Sunken Grove | P-7 | The Wilds | ✔ | ✔ | |
| Ashen Reaches | V-23 | The Devil’s Roar | |||
| Fetcher’s Rest | V-12 | The Devil’s Roar | |||
| Flintlock Peninsula | W-14 | The Devil’s Roar | |||
| Ruby’s Fall | Y-16 | The Devil’s Roar | |||
| The Devil’s Thirst | W-21 | The Devil’s Roar |
The Devil’s Roar large islands carry no animals – the volcanic activity makes them inhospitable to anything that doesn’t want to be cooked alive.
Small Islands
| Name | Grid | Region | Chickens | Pigs | Snakes |
|---|---|---|---|---|---|
| Boulder Cay | G-5 | The Shores of Plenty | ✔ | ||
| Lagoon of Whispers | D-12 | The Shores of Plenty | ✔ | ||
| Lonely Isle | G-8 | The Shores of Plenty | ✔ | ||
| Picaroon Palms | I-4 | The Shores of Plenty | ✔ | ||
| Rapier Cay | D-8 | The Shores of Plenty | ✔ | ||
| Rum Runner Isle | H-9 | The Shores of Plenty | ✔ | ||
| Salty Sands | G-3 | The Shores of Plenty | ✔ | ||
| Sandy Shallows | D-5 | The Shores of Plenty | ✔ | ||
| Sea Dog’s Rest | C-11 | The Shores of Plenty | ✔ | ||
| Twin Groves | H-11 | The Shores of Plenty | ✔ | ||
| Barnacle Cay | O-15 | The Ancient Isles | ✔ | ||
| Booty Isle | K-20 | The Ancient Isles | ✔ | ||
| Castaway Isle | K-14 | The Ancient Isles | ✔ | ||
| Chicken Isle | I-16 | The Ancient Isles | ✔ | ||
| Cutlass Cay | M-18 | The Ancient Isles | ✔ | ||
| Fools Lagoon | I-14 | The Ancient Isles | ✔ | ||
| Lookout Point | I-20 | The Ancient Isles | ✔ | ||
| Mutineer Rock | N-19 | The Ancient Isles | ✔ | ||
| Old Salts Atoll | F-18 | The Ancient Isles | ✔ | ||
| Paradise Spring | L-17 | The Ancient Isles | ✔ | ||
| Black Sand Atoll | O-3 | The Wilds | ✔ | ||
| Black Water Enclave | R-5 | The Wilds | ✔ | ||
| Blind Man’s Lagoon | N-6 | The Wilds | ✔ | ||
| Isle of Last Words | O-9 | The Wilds | ✔ | ||
| Liar’s Backbone | S-11 | The Wilds | ✔ | ||
| Plunderer’s Plight | Q-6 | The Wilds | ✔ | ||
| Scurvy Isley | K-4 | The Wilds | ✔ | ||
| Shark Tooth Key | P-13 | The Wilds | ✔ | ||
| Shiver Retreat | Q-11 | The Wilds | ✔ | ||
| Tri-Rock Isle | R-10 | The Wilds | ✔ | ||
| Brimstone Rock | X-18 | The Devil’s Roar | |||
| Cinder Islet | U-14 | The Devil’s Roar | |||
| Cursewater Shores | Y-13 | The Devil’s Roar | |||
| Flame’s End | V-19 | The Devil’s Roar | |||
| The Forsaken Brink | U-16 | The Devil’s Roar | |||
| Glowstone Cay | Z-18 | The Devil’s Roar | |||
| Magma’s Tide | Y-20 | The Devil’s Roar | |||
| Roaring Sands | U-21 | The Devil’s Roar | |||
| Scorched Pass | X-11 | The Devil’s Roar |
Skeleton Forts
No animals spawn on any Skeleton Fort. These locations host the Skeleton Fort and Fort of Fortune raid-style world events. They’re not targets for most traditional voyages (Lost Shipments being the exception), and random treasure doesn’t spawn there either.
| Name | Grid | Region |
|---|---|---|
| Keel Haul Fort | C-6 | The Shores of Plenty |
| Hidden Spring Keep | I-8 | The Shores of Plenty |
| Sailor’s Knot Stronghold | E-14 | The Shores of Plenty |
| Lost Gold Fort | H-17 | The Ancient Isles |
| Fort of the Damned | L-14 | The Ancient Isles |
| The Crow’s Nest Fortress | O-17 | The Ancient Isles |
| Skull Keep | P-9 | The Wilds |
| Kraken Watchtower | L-6 | The Wilds |
| Shark Fin Camp | P-5 | The Wilds |
| Molten Sands Fortress | Z-11 | The Devil’s Roar |
The Fort of the Damned sits at L-14 in The Ancient Isles – previously known as Old Boot Fort before being renamed in patch 2.0.8. It hosts a unique raid variant not found at the others. Most regions have three Skeleton Forts; The Devil’s Roar has only one, while The Ancient Isles has two standard forts plus the Fort of the Damned.
Uncharted and Special Islands
| Name | Grid | Region | Notable Features |
|---|---|---|---|
| The Reaper’s Hideout | I-12 | No associated region | Base of operations for the Reaper’s Bones; was added to the map table in patch 2.0.14. |
| Uncharted Island (K-9) | K-9 | The Shores of Plenty | Cave system with a Skeleton Throne underneath; Coral Inu found on the beach. |
| Uncharted Island (N-13) | N-13 | The Wilds | Coral reefs, ancient underwater cave, and the Magpie’s Wing shipwreck. |
| Uncharted Island (K-11) | K-11 | No associated region | Home of The Glorious Sea Dog Tavern, former base for the Sea Dogs. |
| Tribute Peak | Y-3 | The Devil’s Shroud | Also called The Shores of Gold; hidden deep in The Devil’s Shroud east of The Wilds. |
| Old Sailor Isle | n/a | Outside Sea of Thieves | Exists beyond The Devil’s Shroud; only visited during the Maiden Voyage tutorial. |
A useful note about No Man’s Sea specifically: three locations exist out there – Uncharted Island (K-9), The Glorious Sea Dog Tavern at K-11, and The Reaper’s Hideout at I-12. If you’re hunting these down, none of them show on the standard chart you’re sailing with.
Map Features, Tools, and Customization
The interactive map tool built by the community packs more navigation utility than anything you’ll find in the vanilla game UI. Here’s what the full feature set looks like and how each piece actually helps.
Core navigation tools:
- Map Search – type any island name, point of interest, or landmark and jump straight to it instead of scanning the entire chart manually.
- Map Filters – toggle specific marker categories on or off; showing everything simultaneously turns the display into visual chaos, so filtering down to just Tall Tale locations or just Shipwrecks keeps things readable.
- Legend – every marker icon explained, covering Smugglers’ League locations, Voyages, Tall Tales, Landmarks, Shipwrecks, Outposts, Animals, Trading Companies, Points of Interest, and more.
Custom map functionality:
- Select “Create Map” from the menu.
- Add custom markers wherever you want them – useful for marking quest locations mid-session.
- Set visibility to Public so anyone with the link can view your layout.
- Share the link with crewmates before or during a session.
- Edit or delete markers as your voyage progresses.
Commendation Tracker – logs which commendations you’ve completed and highlights the relevant map locations still needed. Genuinely useful for grinding toward Pirate Legend.
Settings panel options:
- Highlight Regions on the map with color overlays.
- Show or hide region boundary lines.
- Adjust region boundary opacity (so it doesn’t overpower the base map).
- Highlight Outposts specifically for quick port identification.
- Hide completed markers – essential once you’ve cleared an area.
- Language selection: English, Chinese (Simplified), Deutsch, Español (LA), French, Portuguese (BR), Russian, Turkish.
Mobile availability: The tool runs on Android and iOS, so you can keep the chart open on a phone or tablet while playing without alt-tabbing or switching windows.
Trade Routes and Merchant Alliance Maps

Commodity runs are among the most consistently profitable activities available, and the logic behind them is refreshingly simple once you grasp it.
The core mechanic:
Every outpost holds a surplus of one type of good and a shortage (labeled “Sought After”) of another. Buy wherever something is surplus – you’ll pay less. Sell where it’s Sought After – you’ll earn more than you paid. That spread between purchase and sale price is your profit.
- Surplus = buy cheap here, but don’t sell here (they’ll pay you less than purchase price).
- Sought After = this is your sell destination (they pay above purchase price).
The Merchant Alliance posts fresh trade routes every Monday at 12:00 AM UTC – so what’s profitable this week changes next week. Always check before stocking up.
Example outpost assignments:
| Outpost | Surplus (Buy Cheap) | Sought After (Sell Here) |
|---|---|---|
| Sanctuary Outpost | Tea | Spices |
| Port Merrick | Stone | – |
| Plunder Outpost | Materials; Silks; Tea; Munitions; Gemstones | Varies |
| Ancient Spire Outpost | Spices; Stone; Gemstones | Varies |
| Dagger Tooth Outpost | Munitions; Materials; Silks | Varies |
| Galleon’s Grave Outpost | Varies | Varies |
| Morrow’s Peak Outpost | Varies | Varies |
Full list of tradeable goods:
Tea; Spices; Stone; Materials; Silks; Munitions; Gemstones; Sugar; Minerals; Gunpowder; Ingredients.
Planning a profitable run:
- Check the current week’s trade route before buying anything.
- Identify which outpost has your target good listed as Surplus (cheapest purchase price).
- Confirm which destination has that same good as Sought After.
- Buy along your sailing route anywhere surplus quantities exist – you don’t have to start at the cheapest outpost if a closer one is also surplus.
- Sail directly to your Sought After destination and sell.
The interactive map tool includes a Trade Routes Tracker that updates weekly and lets you visualize the entire route on the world map before casting off.
Tall Tales, Campaigns, and Event Map Locations
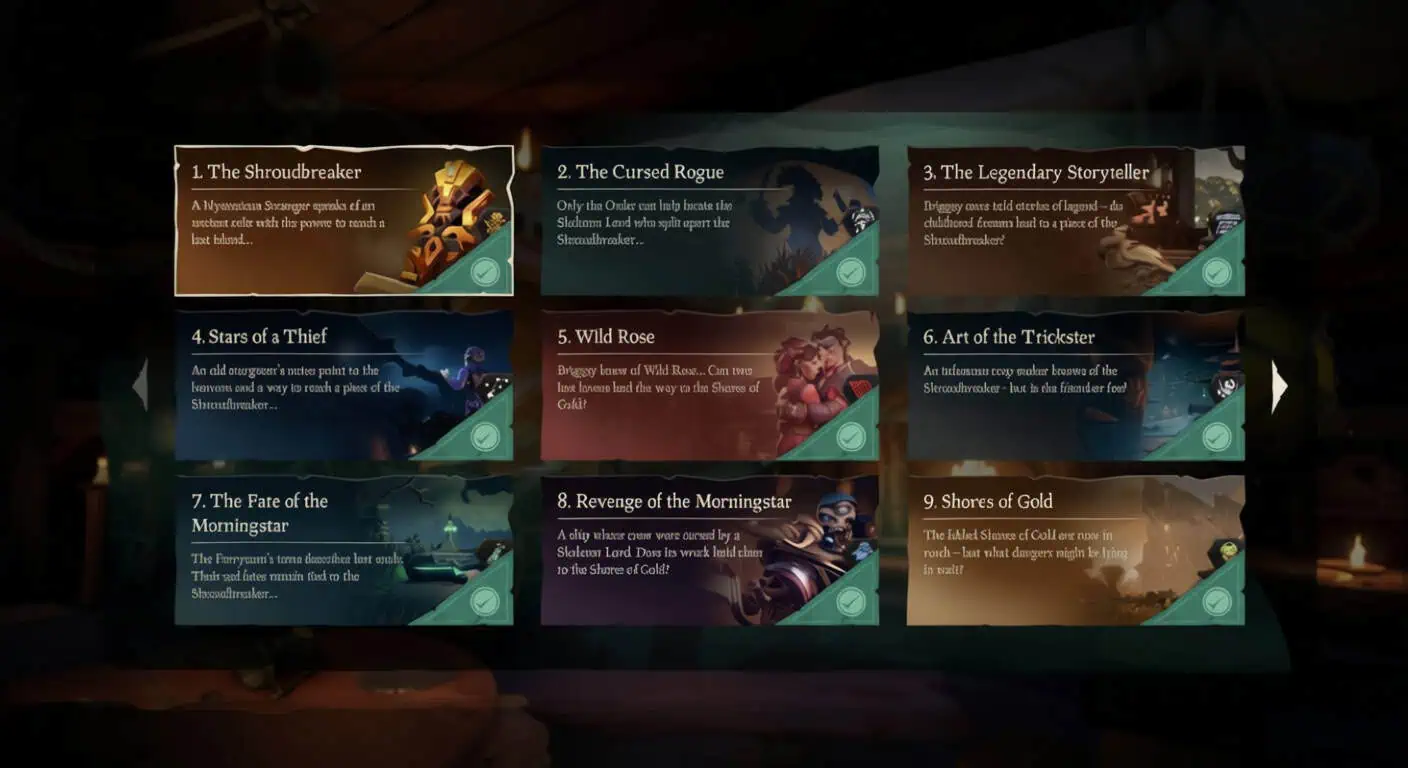
Every Tall Tale chains together map-based objectives across specific island locations. These aren’t standard voyages – they’re narrative missions that require following physical clues, solving environmental puzzles, and sometimes leaving the main Sea of Thieves entirely.
The Shroudbreaker
- Visit Any Mysterious Stranger.
- Find Magpie’s Wing Ship’s Log.
- Find the Ancient Chest.
- Enter the Ancient Vault and solve the puzzle.
- Locate Vault Medallions.
- Return to Any Mysterious Stranger.
Journals: The Shroudbreaker Journals are scattered throughout the relevant locations.
The Cursed Rogue
- Visit Madame Olivia at Plunder Outpost.
- Retrieve the Skeleton Key.
- Retrieve the Skeleton Chest.
- Return to Madame Olivia at Plunder Outpost.
- Defeat Captain Briggsy.
- Return to Madame Olivia at Plunder Outpost.
Journals: The Cursed Rogue Journals found across the route.
The Legendary Storyteller
- Visit Tasha at Ancient Spire Outpost.
- Complete the story chapters:
- Smallest Boat
- Fish Friends
- Treasure Adventure
- Baddies Attack
- Naughty Man
- Monster Hunting
- Monster Island
- Scary Friends
- Windy Wings
- Birthday Party
- Rescue Mission
- Retrieve the Ancient Crown.
- Return to Tasha at Ancient Spire Outpost.
Journals: The Legendary Storyteller Journals collected during the story chapters.
Stars of a Thief
- Visit Sudds at the North Star Seapost.
- Find the Enchanted Spyglass.
- Complete stellar objectives:
- Great Eagle Landing
- A Man Who Lost His Gem
- A Hunt
- Lost an Eye
- The Patient One
- Battle in the Heavens
- Sea Queen’s Promise
- They Were Voyagers
- Snake’s Deception
- Place Star Jewels to obtain the Totem.
- Enter the Ancient Vault and solve the puzzle.
- Return to Sudds at the North Star Seapost.
Journals: Stars of a Thief Journals located throughout the voyage.
Wild Rose
- Visit Madame Olive at Sanctuary Outpost.
- Find the Chest of Memories.
- Follow the diary-style chapters:
- Our First Kiss
- 3b – 3k. Additional diary entries (including first ambush, Pig Chase, and others).
- Return to Madame Olive at Sanctuary Outpost.
- Find Rose and George.
- Return to Madame Olive at Sanctuary Outpost.
Journals: Wild Rose Journals discovered across the tale.
Art of the Trickster
- Visit Salty at Plunder Valley.
- Find the Rum Bottle Spyglass.
- Find the Trapmaker’s Key.
- Take the Trapmaker’s Key to Sailor’s Bounty.
- Enter the Ancient Vault and eliminate skeletons.
- Return to Salty at Plunder Valley.
Journals: Art of the Trickster Journals hidden throughout.
The Fate of the Morningstar
- Visit the Ferryman.
- Obtain the Enchanted Lantern.
- Free the souls of Dinger, Fontaine, and Eli.
- Return to the Ferryman.
Journals: Fate of the Morningstar Journals found during the soul-freeing stages.
The Revenge of the Morningstar
- Visit Sandra at Dagger Tooth Outpost.
- Find the Morningstar Shipwreck.
- Find the Morningstar Chest.
- Talk to Tracy at Sanctuary Outpost.
- Talk to Tyler at Sanctuary Outpost.
- Discover the Skull of Captain Douglas.
- Discover the Chalice of Resurrection.
- Go to Graymarrow’s Resting Spot.
- Return to Sandra at Dagger Tooth Outpost.
Journals: The Revenge of the Morningstar Journals scattered across involved locations.
The Shores of Gold
- Visit Grace at Morrow’s Peak Outpost.
- Travel to the Shores of Gold.
- Acquire the Kraken Medallion.
- Acquire the Warrior Medallion.
- Acquire the Shark Medallion.
- Acquire the Boat Medallion.
- Place all Vault Medallions.
- Enter the Caverns Beneath the Island.
Journals: Shores of Gold Journals found throughout Tribute Peak.
Ashen Tall Tales
The Seabound Soul:
- Speak to Sir Arthur Pendragon.
- Follow ghost ships to Martha Jane’s Skull *(skull location varies by session – it can appear at any of several islands depending on where the ghost ships lead)*.
- Pick up the Ashen Dragon’s trail.
- Follow the ghost ship to Randal Stone’s Skull *(again, location varies)*.
- Pick up the Ashen Dragon’s trail again.
- Locate the Ashen Dragon’s final destination.
- Find the Ancient Skull.
- Return the Ancient Skull to Pendragon.
Journals: The Seabound Soul Journals found along the route.
Ashen Artifacts: Part of the broader Ashen Tall Tales chain.
Heart of Fire:
- Speak with Sir Arthur Pendragon.
- Speak with Grace.
- Locate Stitcher Jim’s Hideout.
- Solve Stitcher Jim’s Hideout Puzzle.
- Light the Chalice.
- Enter the Lair.
- Recover Stitcher’s Chest of Rage.
Journals: Heart of Fire Journals hidden throughout the hideout.
A Pirate’s Life Tall Tales
These crossover missions frequently take you outside the standard world map into separate instanced areas.
A Pirate’s Life:
- Visit Any Mysterious Castaway.
- Sail through the nearest Mythical Portal *(leads outside the main map)*.
The Sunken Pearl:
- Visit Any Mysterious Castaway.
- Sail to the Sunken Kingdom *(requires leaving the main sea)*.
Captains of the Damned; Dark Brethren; Lords of the Sea; Legend of Monkey Island – all require departing the Sea of Thieves proper for significant portions of their runtime. Each has dedicated step-by-step guidance that follows on from the entry points above.
Points of Interest and Map Markers

The interactive map layers dozens of marker categories onto the world chart. Here’s what each one represents and why it matters during active sessions.
Exploration & Lore:
- Smugglers’ Hideouts – concealed caches used by the Smugglers’ League, often tucked into cave systems.
- Smugglers’ Journals – readable lore entries tied to the Smugglers’ League storyline.
- Reaper Contact Locations – spots to interact with Reaper’s Bones contacts across the world.
- Ancient Pillar Locations – remnants of ancient civilizations, relevant to specific Tall Tales and lore.
- Shipwreck Graveyards – clusters of wrecked vessels with salvageable treasure.
- Picture Map Locations – landmarks shown in picture-style clues rather than silhouette maps.
- Haunted Island Statues – statues related to Festival of the Damned and spirit-lighting events.
- Riddle Clues – landmarks that Gold Hoarder riddle maps reference directly.
- Landmarks – named, recognizable features used in riddle and Tall Tale objectives.
- Rock Paintings – painted markings found on rock faces, tied to specific quest clues.
- Mysterious Journals – scattered readable journals connected to various Tall Tales.
Enemies & Events:
- Skeleton Camps – patrol zones where skeleton crews roam in groups.
- Skull of Siren Song – tied to specific world event chains.
- Sea Forts – fortified structures separate from Skeleton Forts, with their own loot and enemy encounters.
- Skeleton Forts – raid event locations hosting the Skeleton Fort and Fort of Fortune world events.
- Skeleton Captains – marked possible spawn locations for captains, Ashen Guardians, and Ashen Key Masters.
World & Environment:
- Vaults – Ancient Vault entrances used in Tall Tales and Gold Hoarder voyages.
- Uncharted Islands – locations that don’t appear on the in-game chart.
- Shipwrecks – floating wrecks with loot; spawn rates vary, so markers represent possible locations.
- Gunpowder Barrels – spawn point indicators; actual rates vary by session.
- Volcanoes – active volcanic hazards concentrated in The Devil’s Roar.
- Ziplines – fast traversal routes across larger islands.
- Ponds – freshwater sources for cooking and survival.
NPCs & Services:
- NPCs (Neighborhood Pirate Characters) – named characters offering dialogue and sometimes quests.
- Cooking Spots – campfire and cooking station locations across islands.
- Seaposts – small neutral platforms at sea with basic services.
- Outposts – main civilization hubs with vendors, quest givers, and trading posts.
- Shipwrights – repair and ship customization services at outposts.
- Taverns – social hubs with the Mysterious Stranger and other key NPCs.
- Festival of the Damned Beacons – beacon lighting locations for the Festival of the Damned event.
Resources & Animals:
- Animals (Chickens; Pigs; Snakes; Lizards) – spawn locations for Merchant Alliance cargo and general wildlife.
- Ammo Chests – resupply points found across islands and forts.
- Cannons – both ship cannons and island-mounted artillery positions.
- Cargo Runs – delivery pickup and drop-off points for Merchant Alliance missions.
- Docks – mooring points at outposts and larger islands.
Trading Companies:
- Gold Hoarders – buried treasure specialists at every outpost.
- Merchant Alliance – cargo and trade route representatives.
- Order of Souls – skull hunters and bounty givers.
- Hunter’s Call – fishing and cooking focused trading company.
- Reaper’s Bones – shadowy faction operating from The Reaper’s Hideout.
- The Sovereigns – newer faction focused on bulk treasure trading.
Map Tips and Best Practices

Everything above only helps if you actually apply it mid-session. These are the habits that separate frustrated pirates from efficient ones.
Before setting sail:
- Always check the map table first – confirm your destination, your current position, and the approximate route. Five seconds at the table saves ten minutes of confused sailing.
- Know which region your quest is in – if you voted in The Ancient Isles, every island on that voyage is in The Ancient Isles. Searching The Shores of Plenty is a waste of time.
While navigating:
- Look at the map before approaching, not while standing on the island – understanding which side you’re arriving from tells you how the silhouette should orient.
- Solo? Plan for constant up-and-down between helm and table – set a waypoint in your head before climbing back to the wheel, don’t try to hold the whole chart mentally.
- Use zoom aggressively – both at the map table and on any voyage maps you’re carrying; small details in island outlines matter enormously when two islands look similar at a glance.
For treasure hunting specifically:
- Find something you recognize first – a distinctive rock cluster, a curved beach, a tree line that matches the map sketch – and anchor your distance calculations from there.
- When the X won’t resolve, bury something yourself – dig anywhere on the island, check where that new X appears relative to yours, and use the comparison to triangulate.
- Distance is harder than direction – once you’re facing the right way, pace out cautiously; most misses happen because someone digs at the right angle but stops too soon or goes too far.
For fishing quests:
- Pirate’s fishing map = one spot guaranteed; hunter’s fishing map = two spots, three fish each.
- No bait required for the special fish at these designated spots – don’t waste supplies.
- When you reach the island, either pull up the map again to pinpoint the spot or watch the water surface for sprinkles indicating a fish concentration.
For Merchant Alliance runs:
- Check trade routes before purchasing anything – what’s profitable resets every Monday at midnight UTC.
- Surplus at your current outpost means cheap purchase; Sought After at your destination means strong sale price.
- You can buy the good anywhere along your route that lists it as surplus – you don’t have to backtrack to the cheapest source if a closer port also has surplus stock.
For interactive map sessions:
- Use filters to reduce visual noise – showing every single marker simultaneously makes the chart unreadable.
- If you’re working through Tall Tales, the commendation tracker keeps you from re-running content you’ve already cleared.
- Create a custom map for your crew before a long session – mark your planned route, quest islands, and intended sell destinations; share the link so everyone stays coordinated.
